Parachute Regiments. British Armys elite Air Assault Infantry
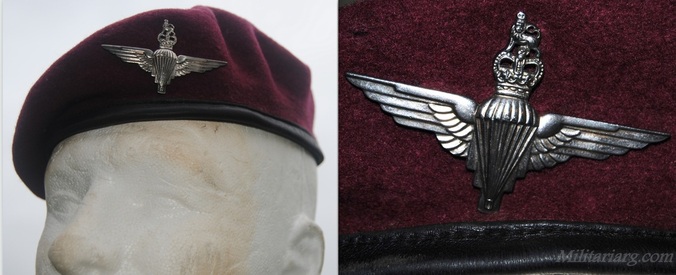
2PARA Maroon Beret. The Maroon beret has the the Imperial Lion and "Queen's" Crown. During the Second World War the royal insignias had the king's crown (George VI). In 1952, with his death and the crown's succession to the hands of his daughter Elizabeth II, the insignias had the queen's crown.
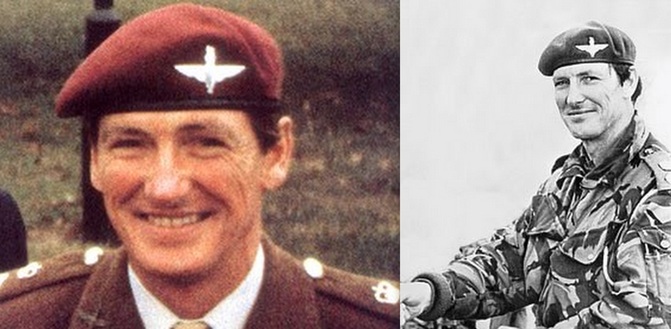
Colonel H Jones. Photos Wikipedia and Dailymail.
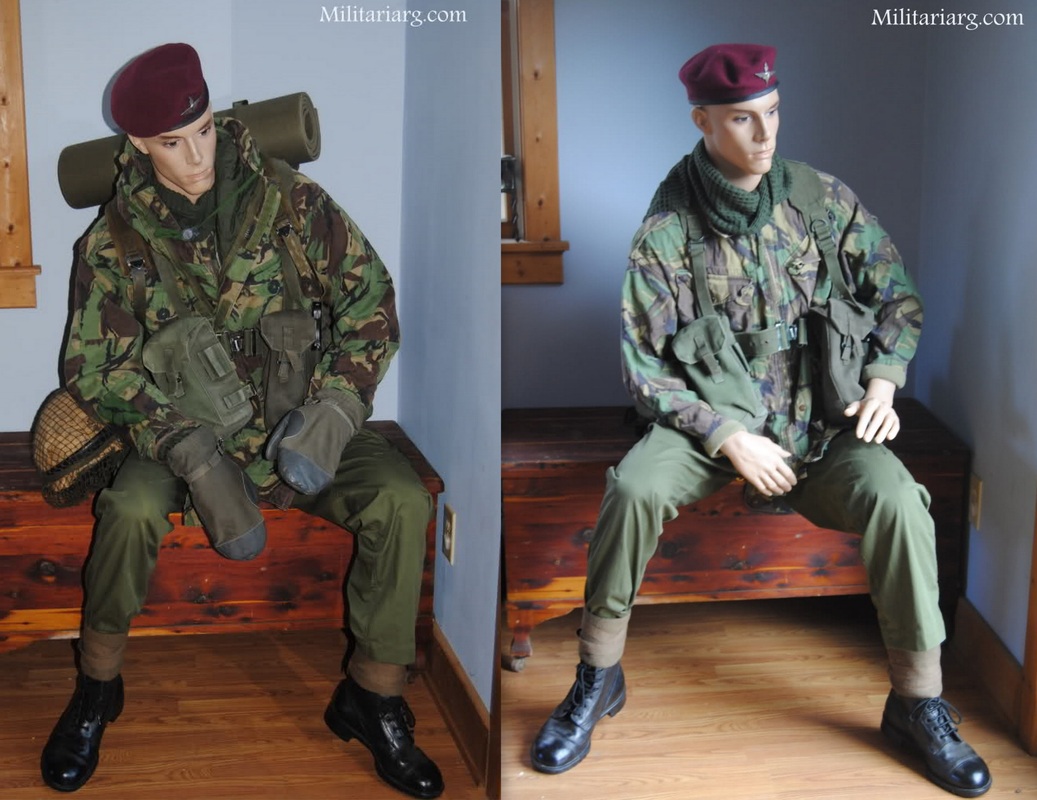
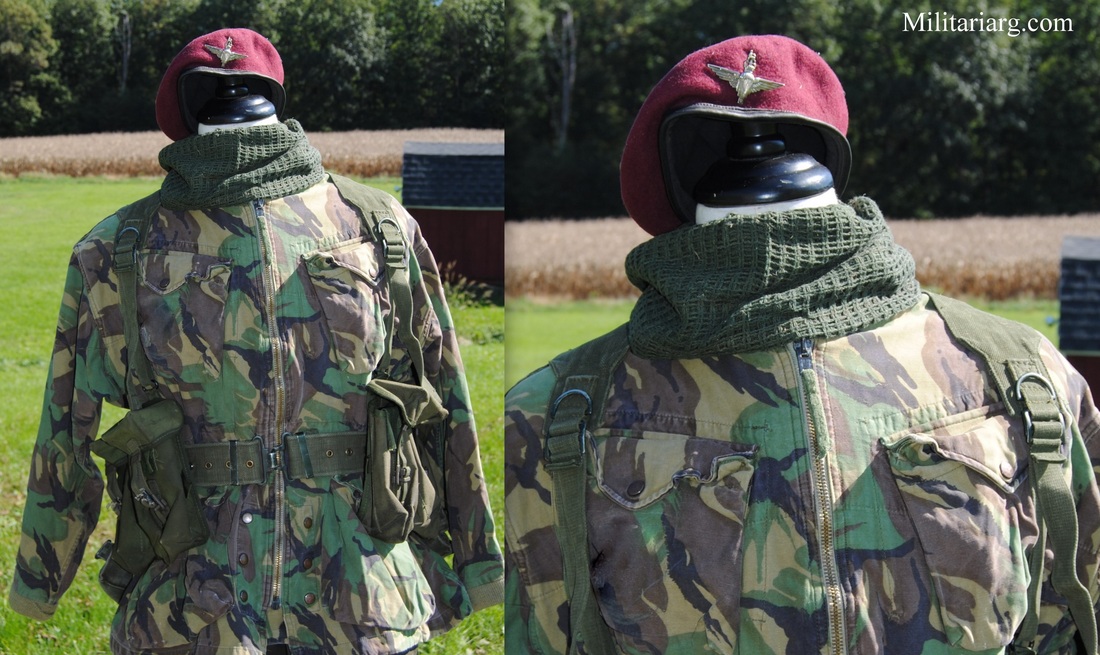
1970s DPM parachute PARA jump smock with Scrim net and maroon beret.
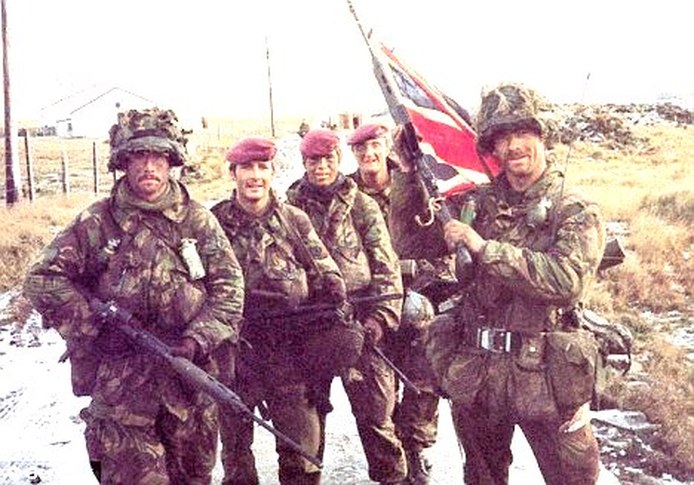
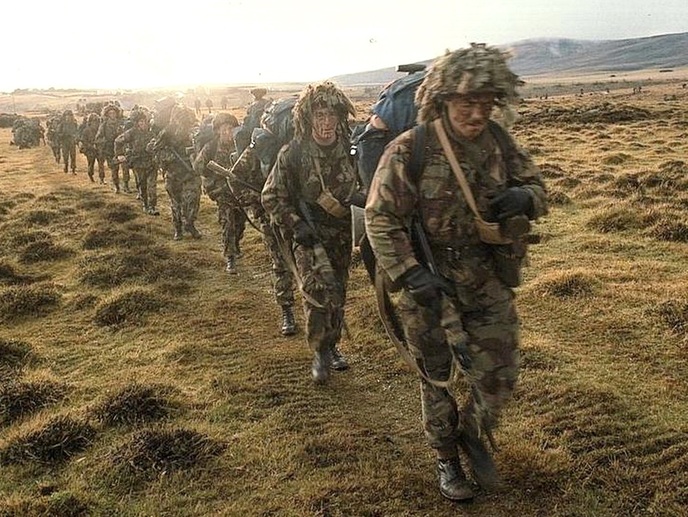
British Paratroopers with SLR L1A1 and M16A1 w/M203 40mm Grenade Launcher (?). The soldier with the flag may have a 66mm LAW (?) which is an anti-tank weapon used in Malvinas against Argentine strongpoints. They also may have used the Swedish Carl Gustav 84mm anti-tank launcher. Note the Smock, Parachutist DPM and the PRC-349. Photo: Dailymail.
According to Wikipedia The Para Smock differs from the three most recent standard patterns of combat jacket, all made from DPM, and is like its Denison predecessor in having no flap to button or velcro over the full length zipper; hip and breast pockets; hem adjustors; and a diaper flap (fastened under the crotch to stop the smock riding up while parachuting) fastened by pres-studs (snaps) (though smaller than on the Denison); and knitted wool cuffs. It is also cut more loosely than the Smock,combat.
According to Wikipedia The Para Smock differs from the three most recent standard patterns of combat jacket, all made from DPM, and is like its Denison predecessor in having no flap to button or velcro over the full length zipper; hip and breast pockets; hem adjustors; and a diaper flap (fastened under the crotch to stop the smock riding up while parachuting) fastened by pres-studs (snaps) (though smaller than on the Denison); and knitted wool cuffs. It is also cut more loosely than the Smock,combat.
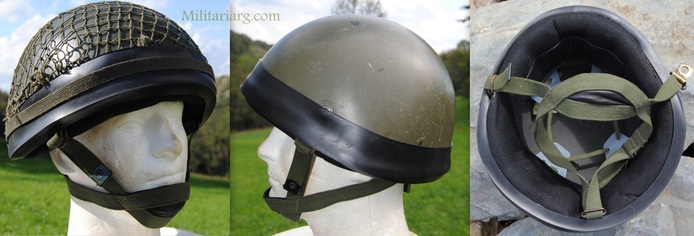
MK1 1980s Para Helmet. Issued to the Parachute Regiment and Special Forces.
Royal Marines
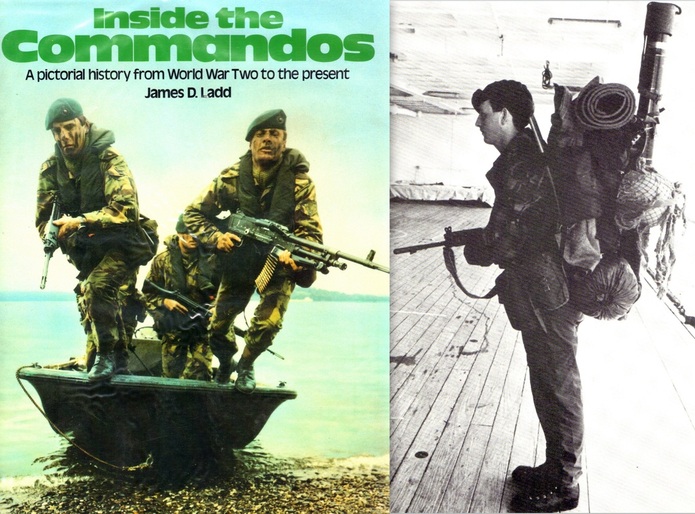
Recommended read:
Inside The Commandos. A pictorial history from World War Two to the present by James D. Ladd. Naval Institute Press. Annapolis Maryland. Jacket Illustration: Royal Marine Commandos in training, land from a Rigid Raiding Craft (RRC). Right: During the voyage south to the Falkland Islands, commandos were given a number of combinations of heavy loads to assess what weight they might carry in an emergency, includin (as seen here) a load with the barrel of an 84mm mortar.
Royal Marine Commandos.
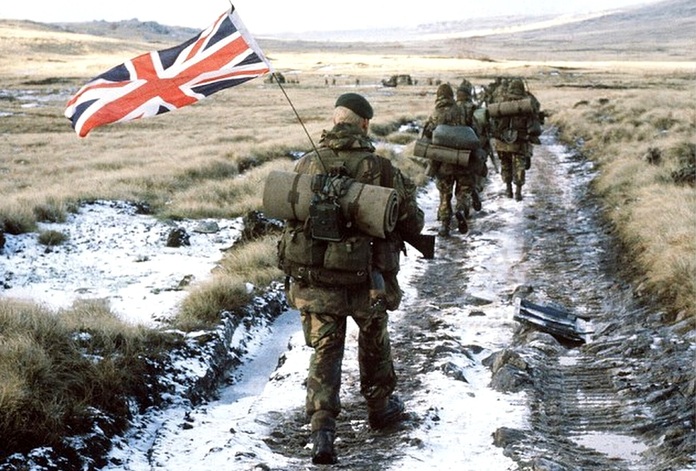
Below the radio is a polystyrene sleeping mat. The soldier in front of him has a sleeping bag. During the campaign the troops used a variety of backpacks, including test models. The standard GS General service (Derived from the P72 trial); The large heavy loads for long missions PARA/SAS/SBS and the Artic Body Rucksack 'Bergen" was named this after a city in Norway where a similar rucksack was used by skiers, type CQC with back frame.
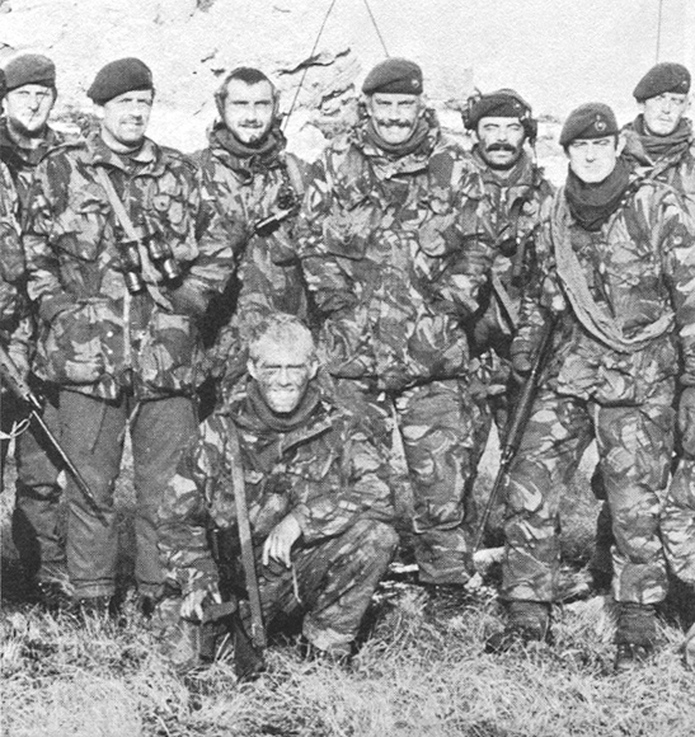
.45 Commando (45 CDO), Royal Marines under Lieutenant-Colonel Andrew Whitehead . DPM Windproof Jacket. Photo: latinamericanstudies.org
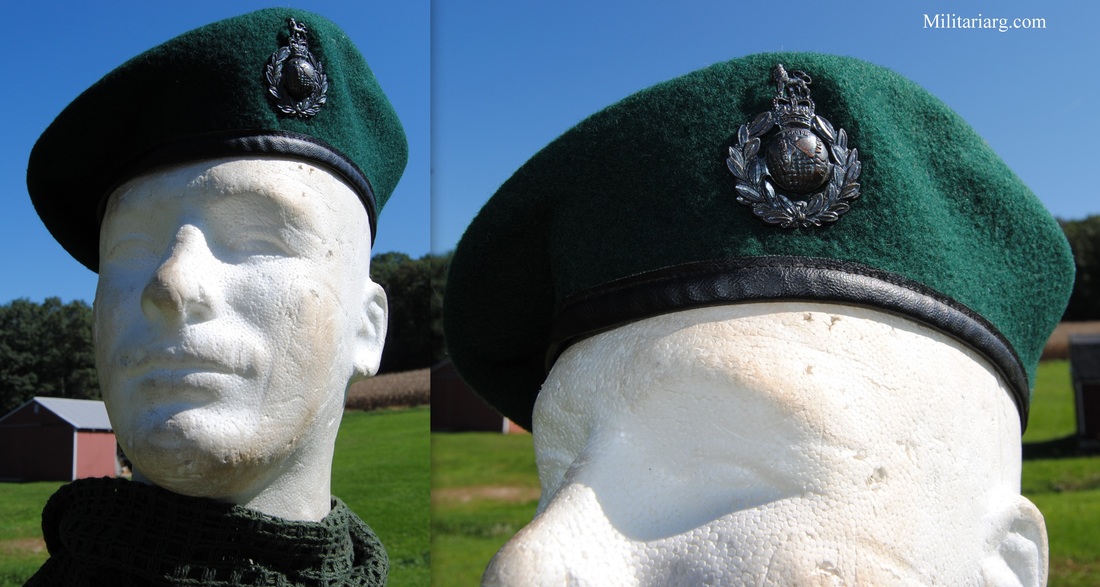
Royal Marine Commando Beret (Made by Kangol", with old Imperial size, not metric size. Note the Olive Green Scrim Scarf.
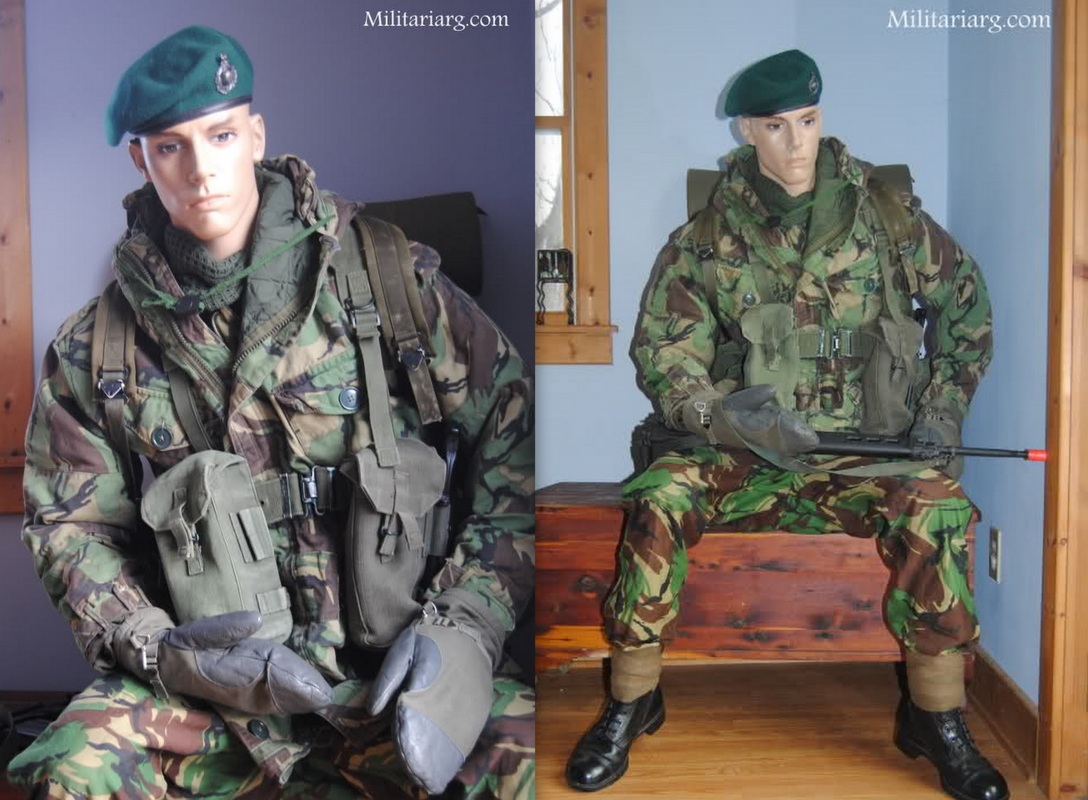
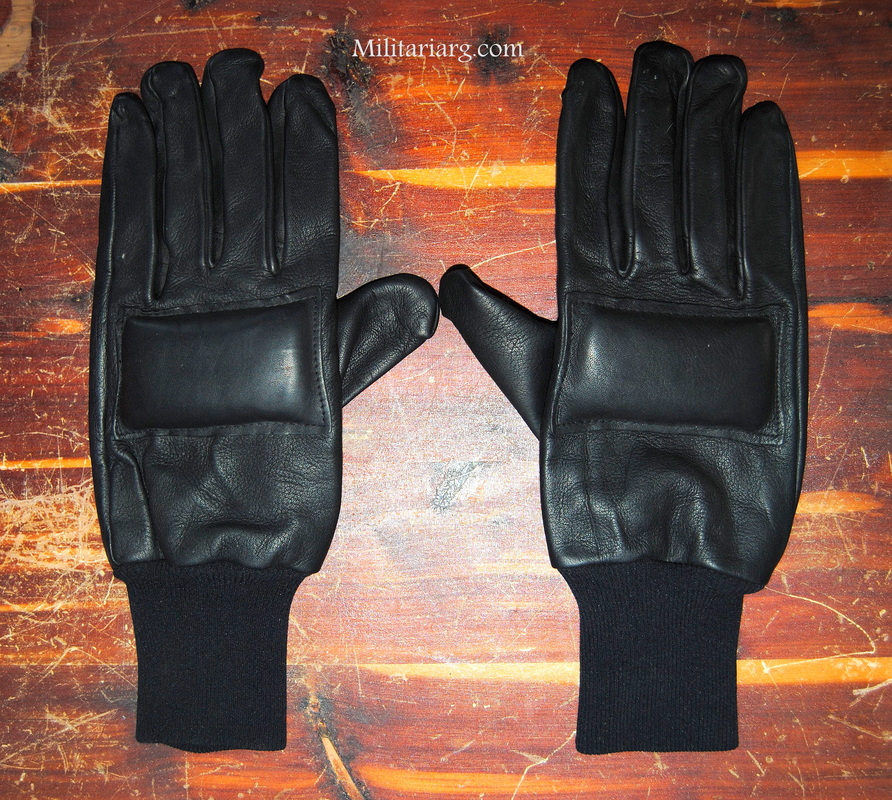
Reinforced leather gloves.
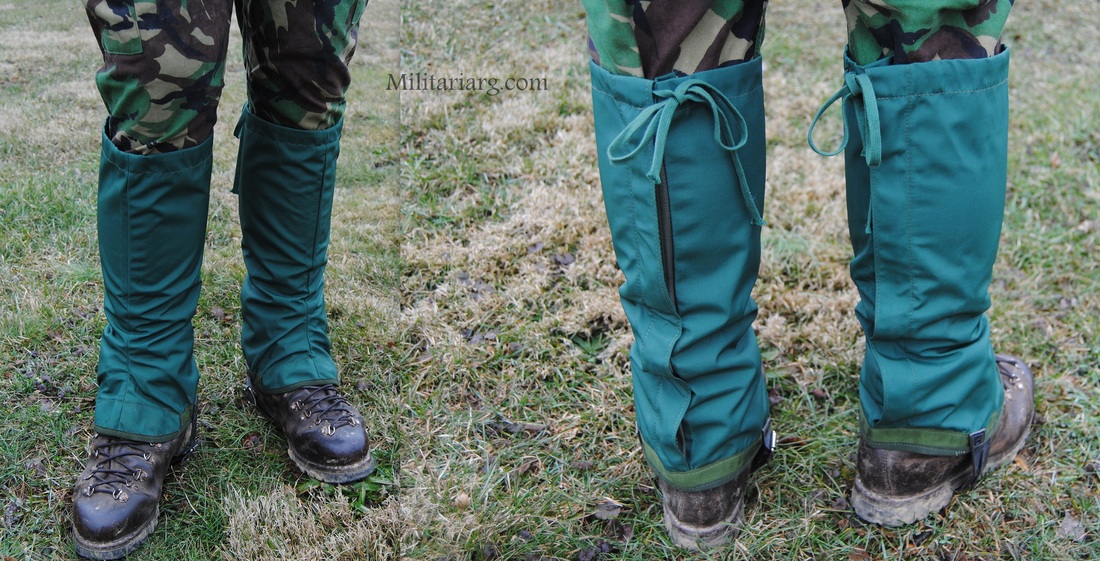
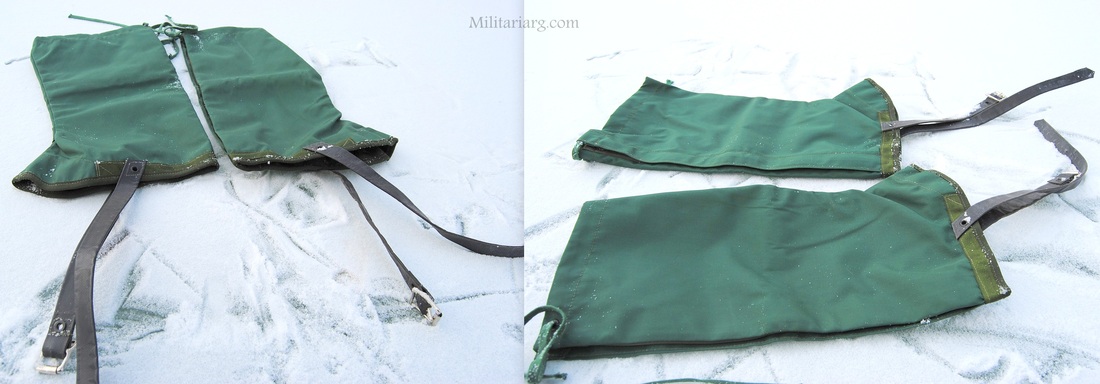
1970s. Royal Marines Snow Mark II Gaiters. CQC PLC
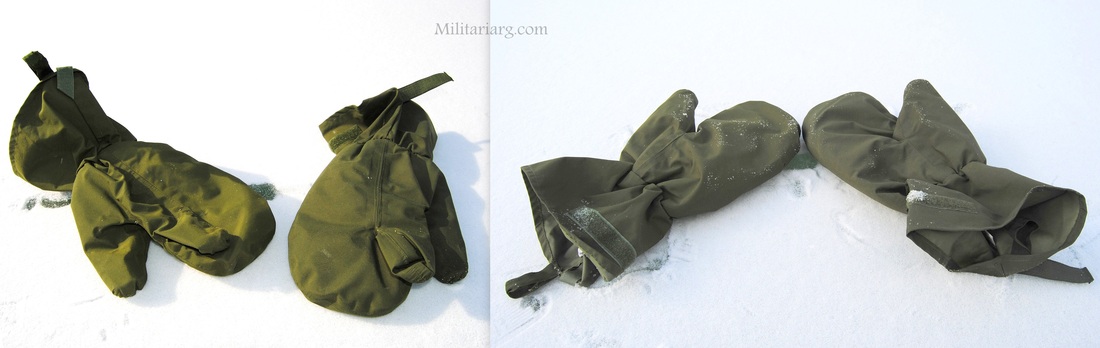
Arctic Gortex Gloves. Mitten Outer Extreme Cold Weather.
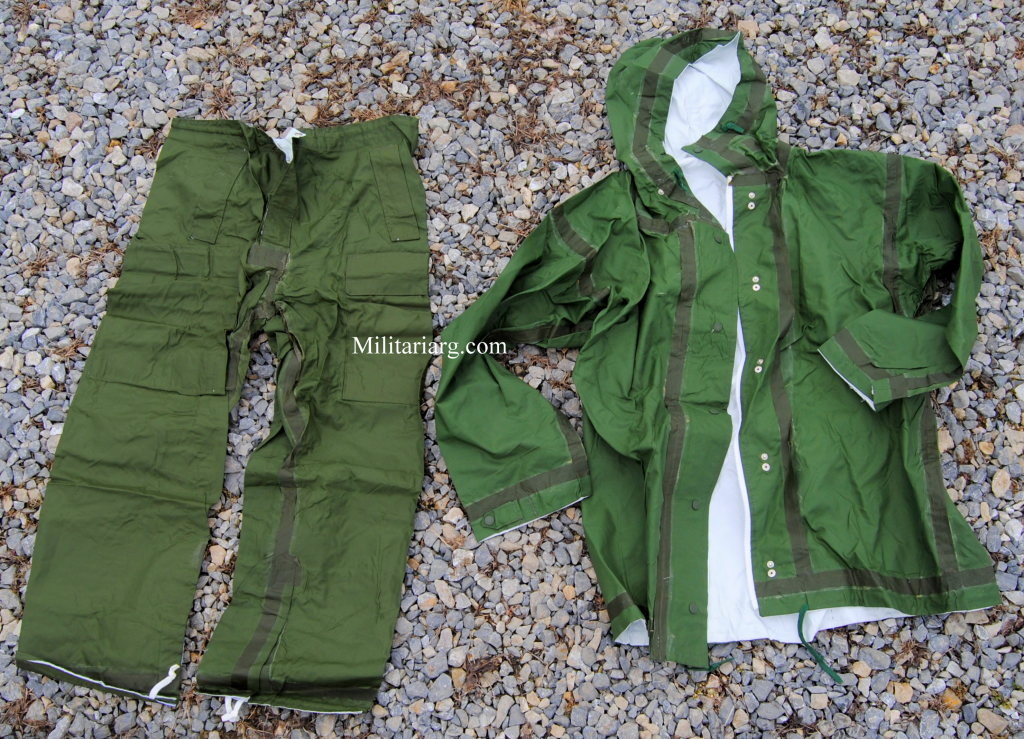
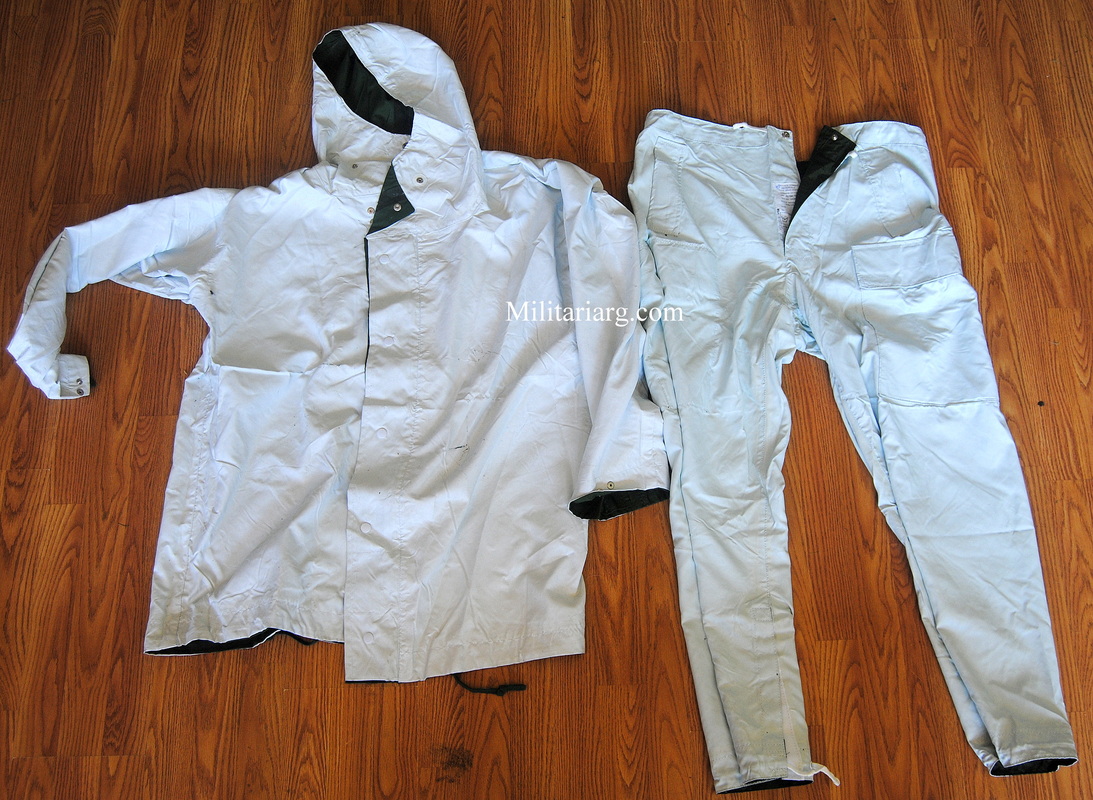
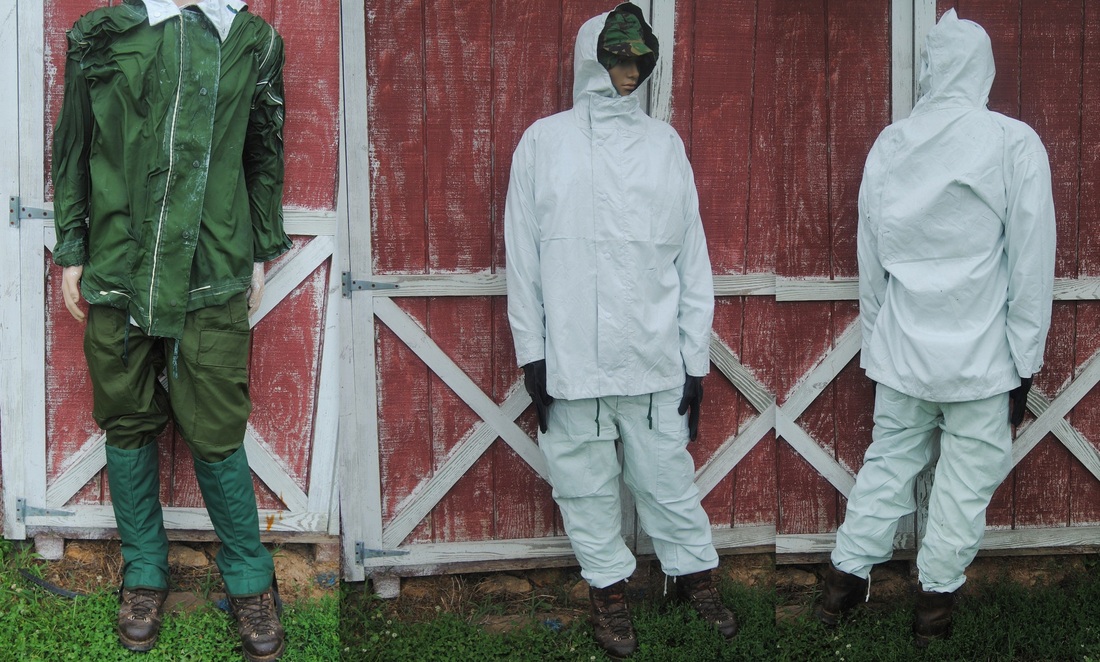
Smock Combat Reversible Olive Drab/White and Trouser Combat Reversible Olive Drab/White. Vacuum Reflex Ltd.
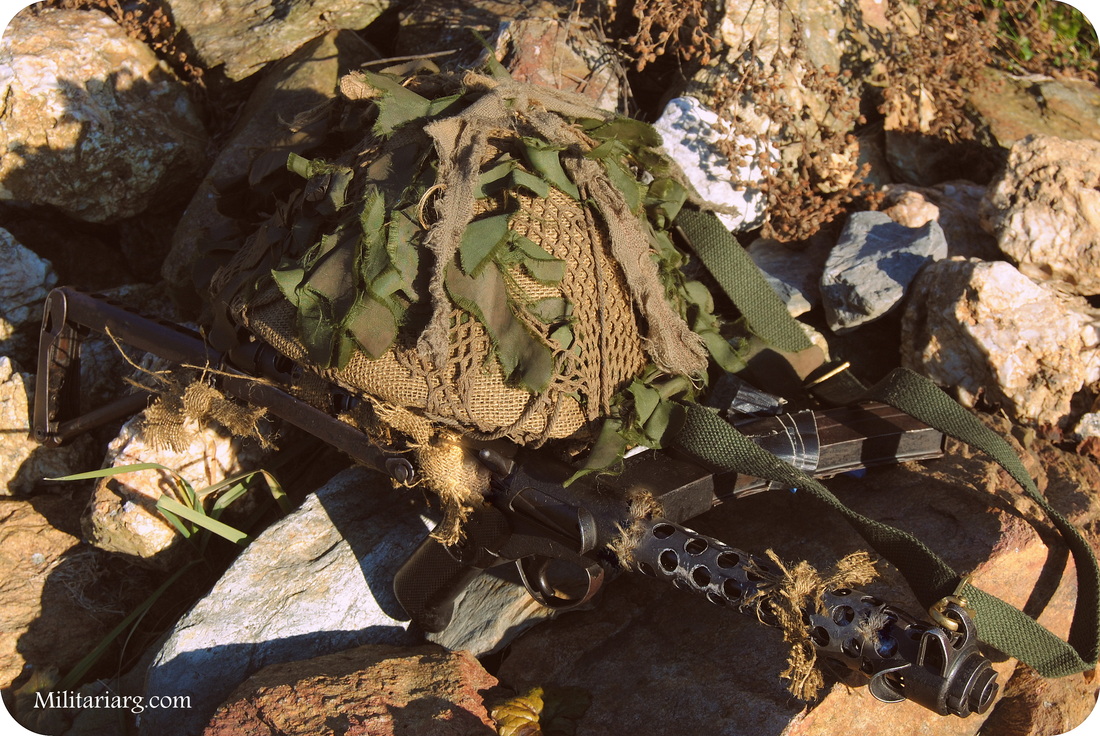
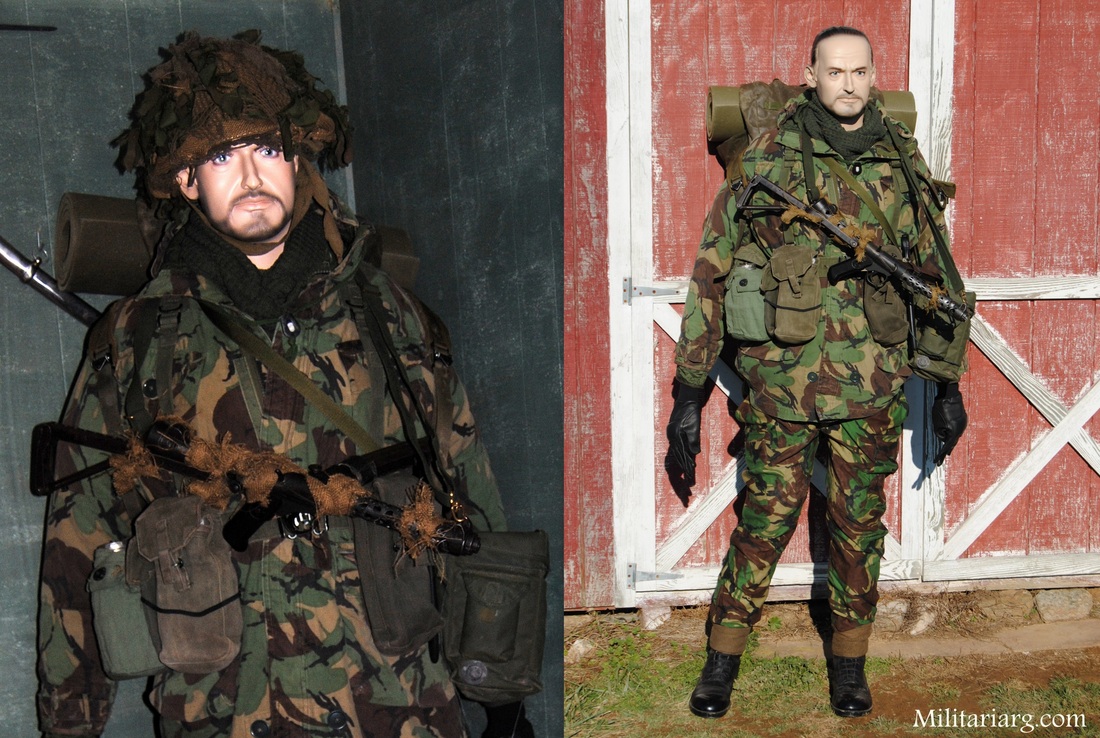
SMG L2A3 Sterling 9mm:
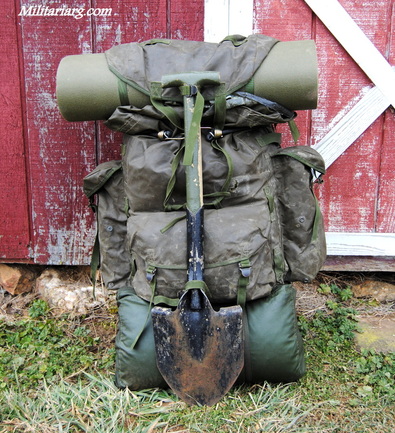
58 Pattern Sleeping Bag and Shovel.
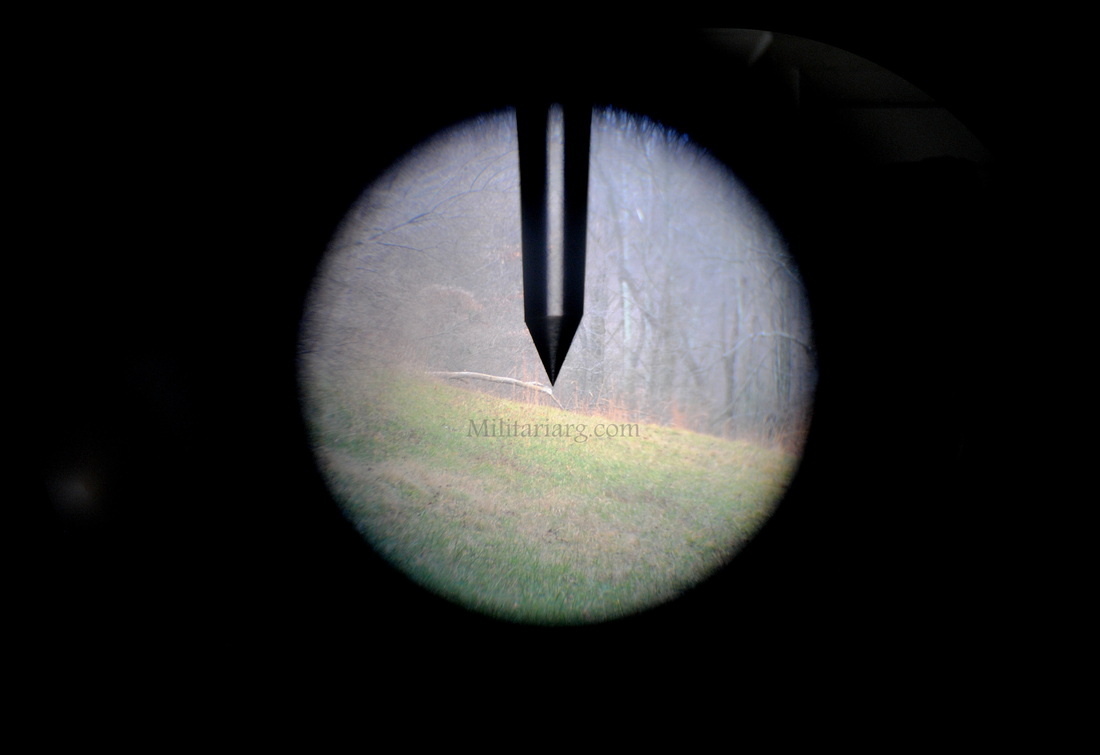
Sight Unit Infantry Trilux (SUIT). L2A2 Trilux:
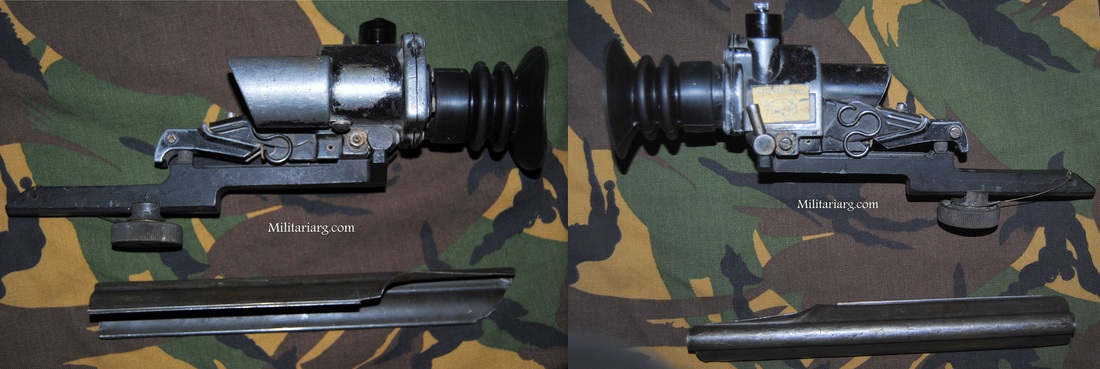
SUIT unit w/ LZA2 mount for AR15/M16.
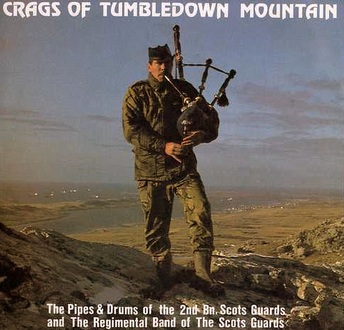
Scots Guards
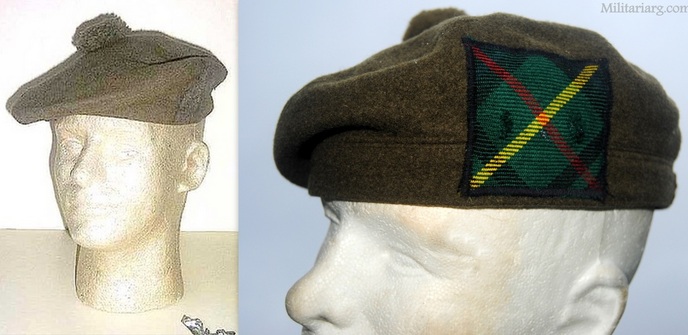
Tam o'shanter (TOS), Queen's Own Highlanders Scottish infantry regiment hat and badge. The stag's head (Deer Head and Royal Crown) is a Scottish Symbol. The Tam or Tammy was worn during World War 1 and World War II, in the postwar replaced for the berets. It is not a Falklands War Item but the Scottish with the Scots Guard 2nd Battalion, fought in The Mount Tumbledown in 1982.
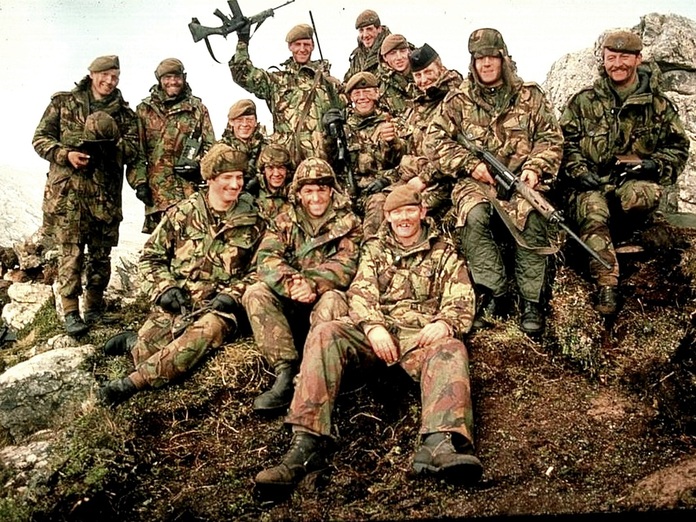
Scots Guard in Mount Tumbledown. Note the second man from the right, dressed in green cold weather trousers also known as "Mao or Chinese fighting suit".
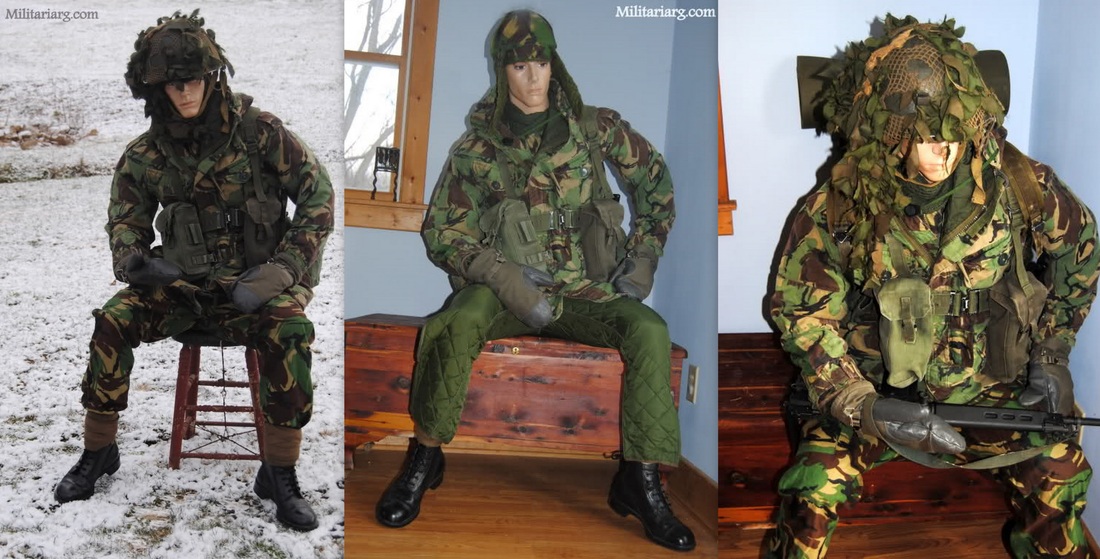
The Royal Gurkha Rifles (RGR)
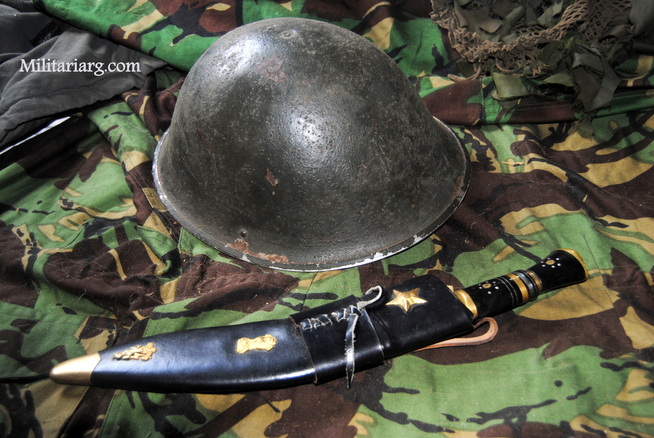
MK5 and Gurkha Kukri Knife.
Helmets
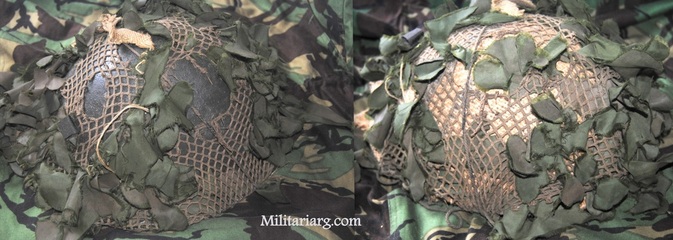
MKV Steel Helmet and MKII Paratrooper helmet w/net.
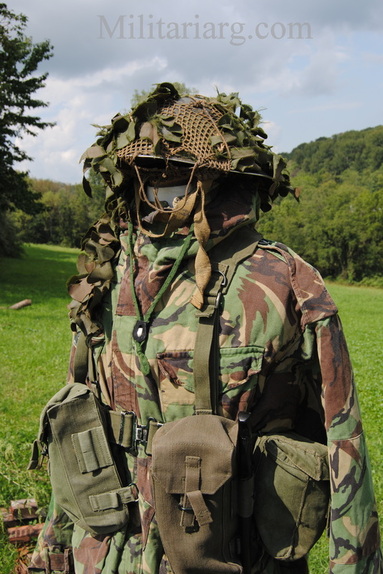
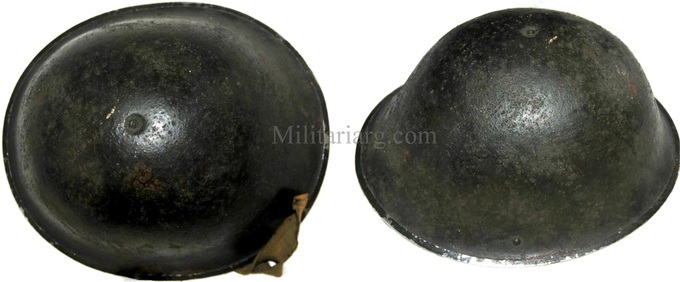
MK.V Steel Helmet (Turtle or Canadian Pattern).
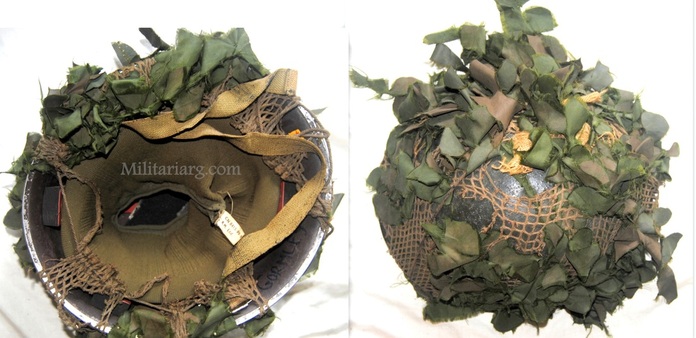
MK5 Steel Helmet
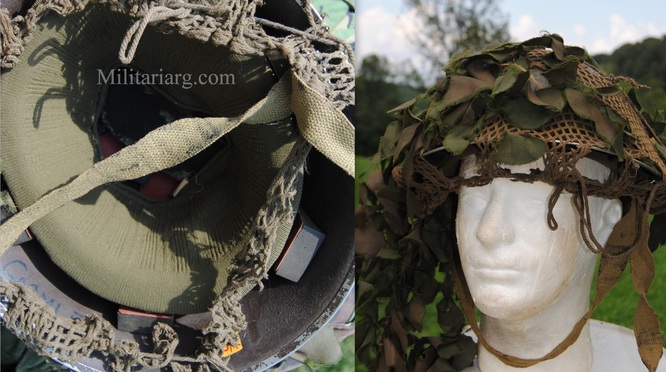
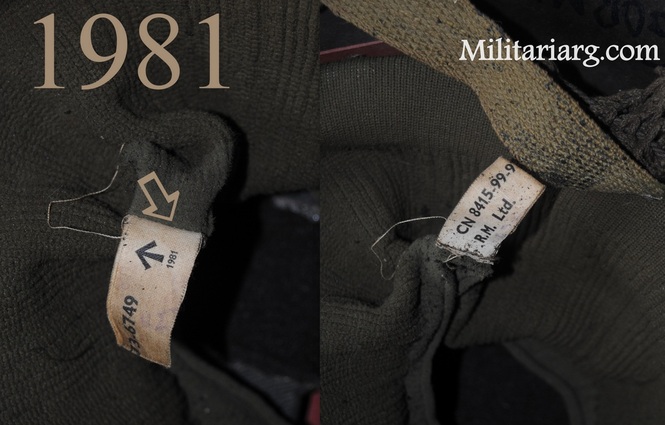
MKV Helmet, made by R.M Ltd.
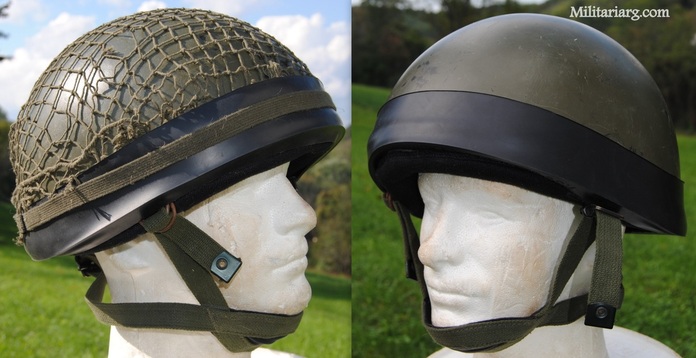
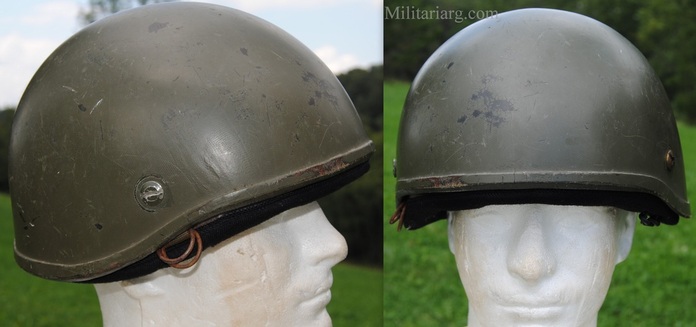
M76 Light-weight Parachute Helmet. These were light weight, non-ballistic styles produced with "D" ring buckles or the early green PVC type chinstrap and different liner versions to test. Some models were seen during the occupation of Ireland in the 1980s. During the Falklands War they used around 2000 of them, both with and without camoflage. The camo that they used was often personalized, but usually the kind used on the old MK2. You can also see in photos that they used fabric on the helmets with net on top of it and held in place by a rubber band. They sometimes also stuck leaves or cloth leaves in the nets.
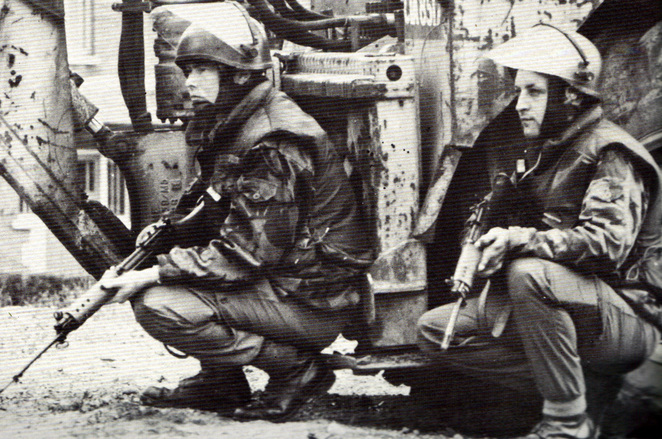
Royal Marines 1980s with Riot Gear. Note the M76 Mk1 Para helmet with visor and PVC chinstrap, SRL L1A1, DPM smock jacket and lightweight trousers and wool gaiters, possibily Northern Ireland. Photo: Inside the Commandos. Naval Institute Press, Annapolis Maryland. In the same publication you can see the use of a MK5 steel riot helmets with visors and standard riot helmets with visors.
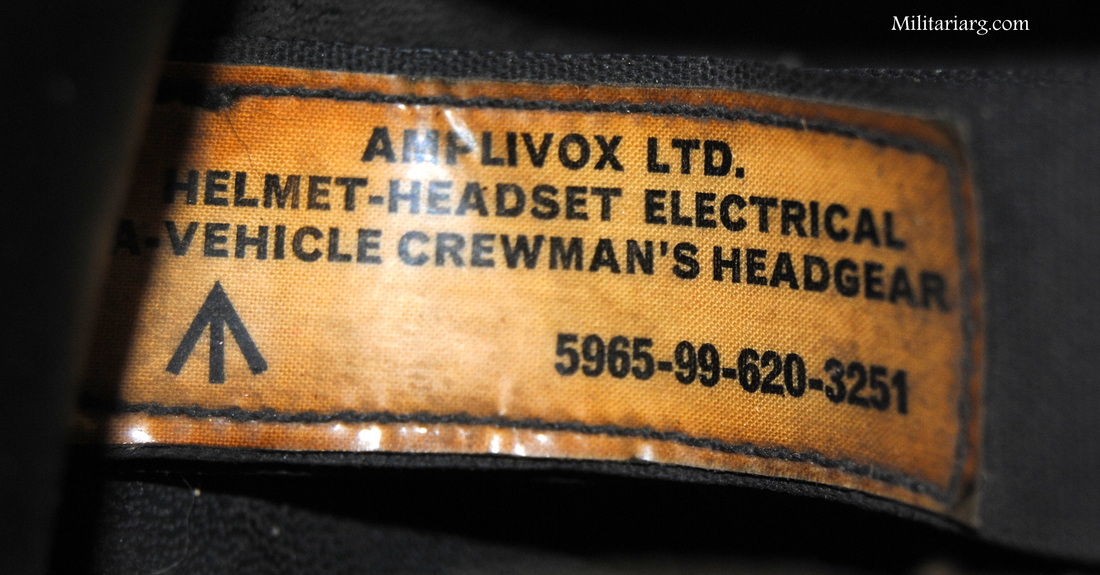
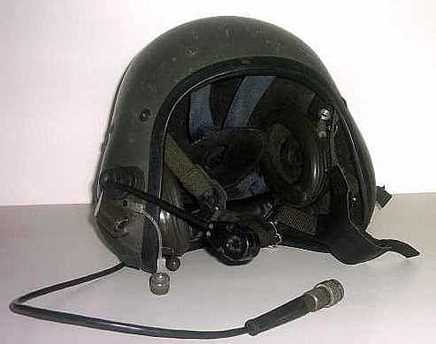
AFV crews helmet made by AMPLIVOX Ltd, Helmet-Headset Electrical Vehicle Crewman's Headgear.
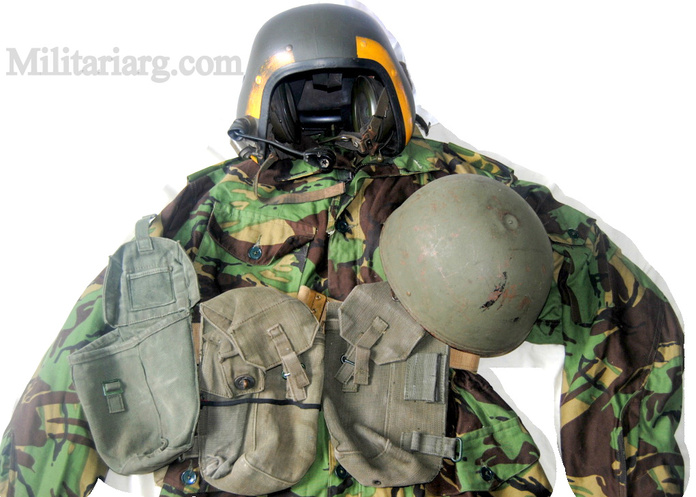
AFV crews' fibre helmet and the RAC helmet (Royal Armoured Corps) and The Old MKII Tanker Helmet.
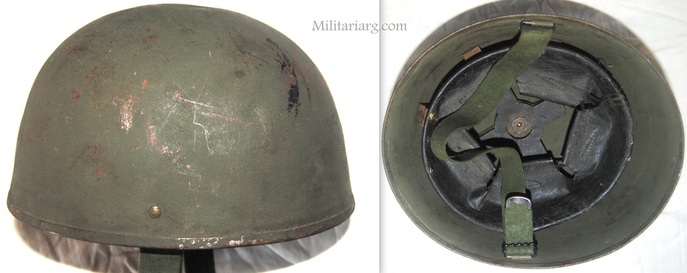
RAC MKII (Armoured Crew), Steel Helmet.
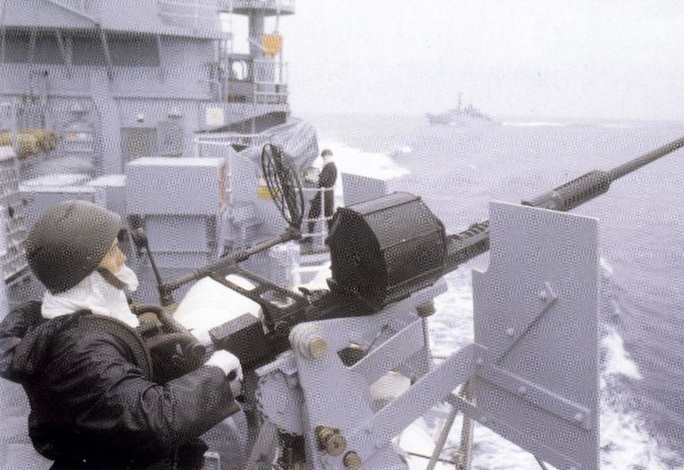
RN MK II Steel Helmet and 20mm AA Oerlikon, HMS Hermes. The black marks on the helmets may be from the liner of another helmet when they are piled on top of each other for storage.
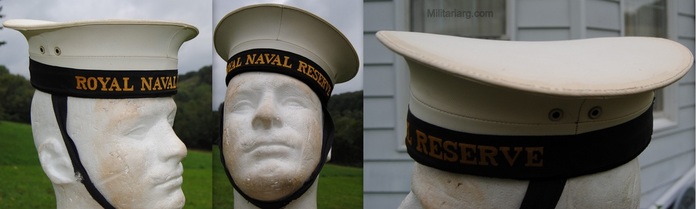
Headgear
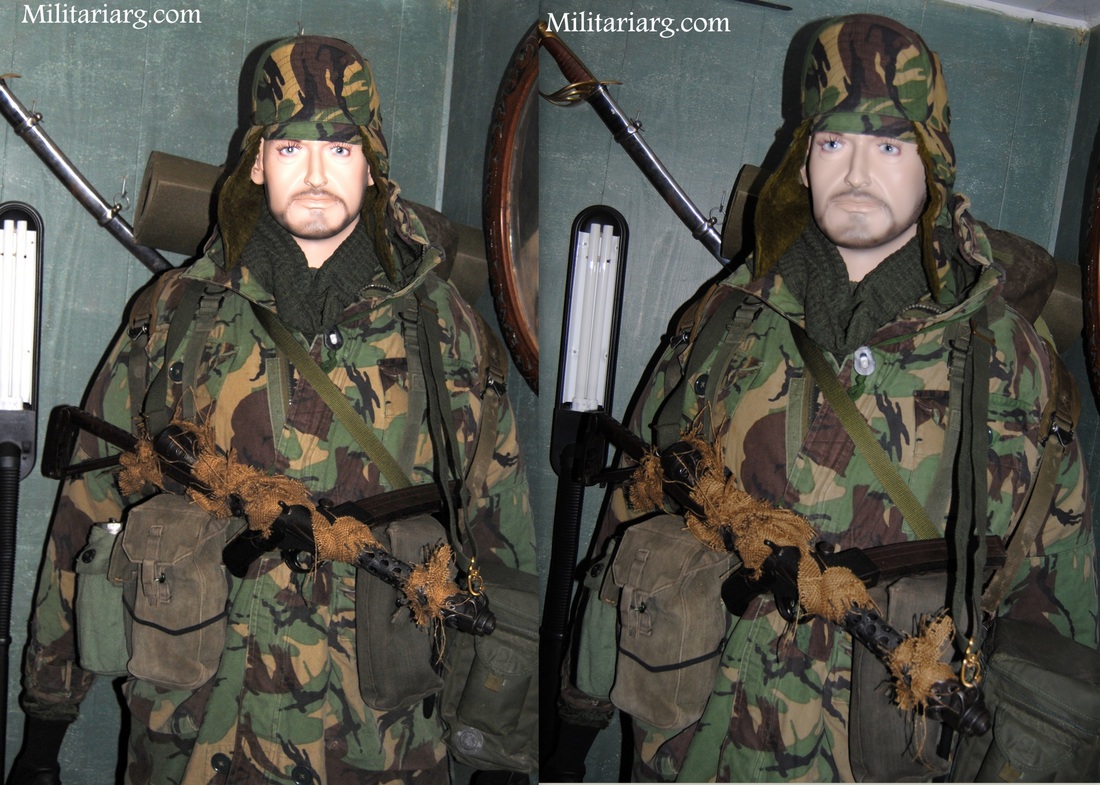
Extreme Cold Weather Hat made by Compton Webb Headdress Ltd.
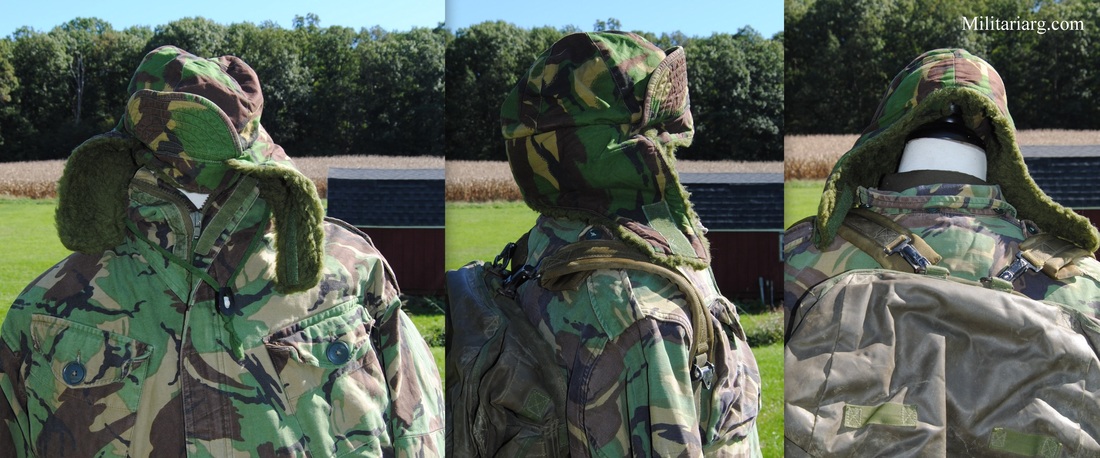
DPM "Deerstalker" Camo, Cold Weather Artic Cap. The British were prepared for the Malvinas cold weather because of the North Pole and from the bases in Germany.
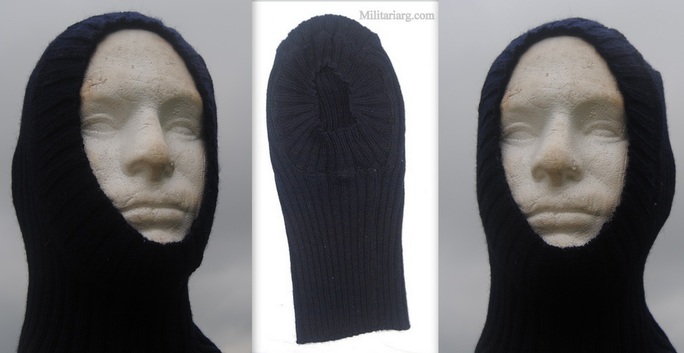
Black Wool Balaclava Royal Merchant Marine also utilized by military, made by REMPLOY Ltd. Falklands War Era.
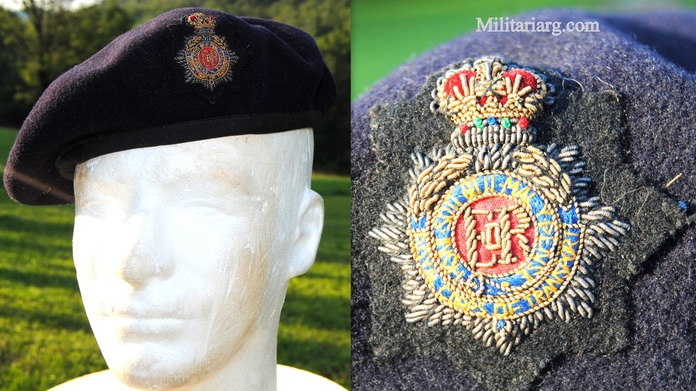
Royal Corps of Transport. RCT beret, made by Moss Bros. The motto is "Honi soit qui mal y pense" which means "Shamed be he who thinks evil of it." This is French origin and can be seen on British passports, many different regiments, and even in Canada and New Zealand.
Footgear
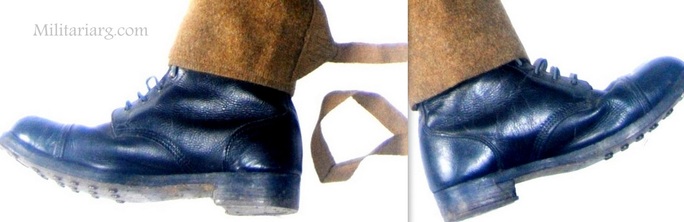
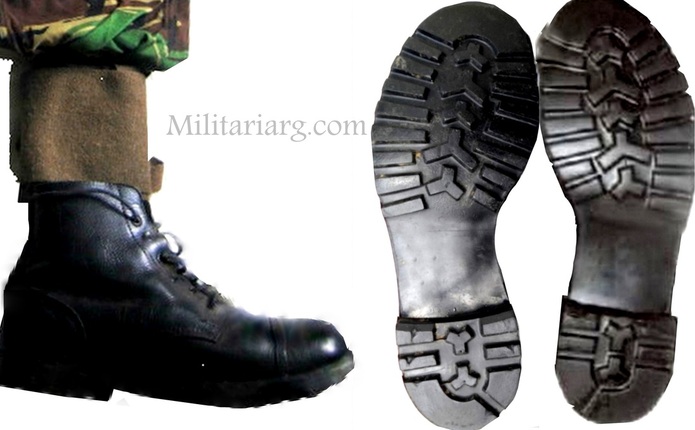
British hobnailed ankle boots and 1960 short woollen puttees made by Uk Fox Brothers & Co Ltd.
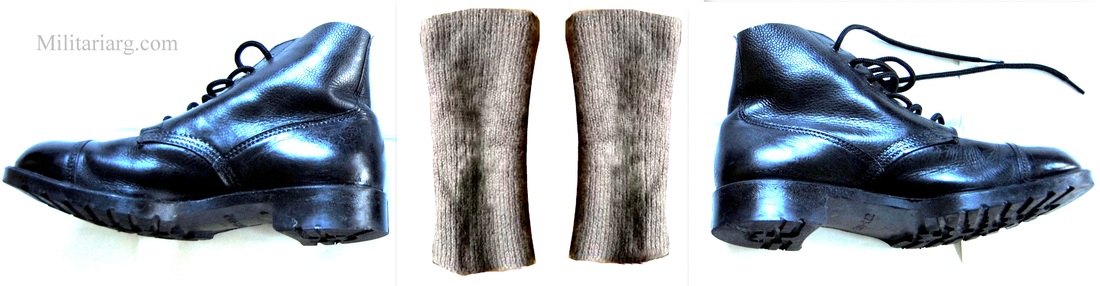
Royal Marine Commando Wool Boot Toppers "Hose Tops".
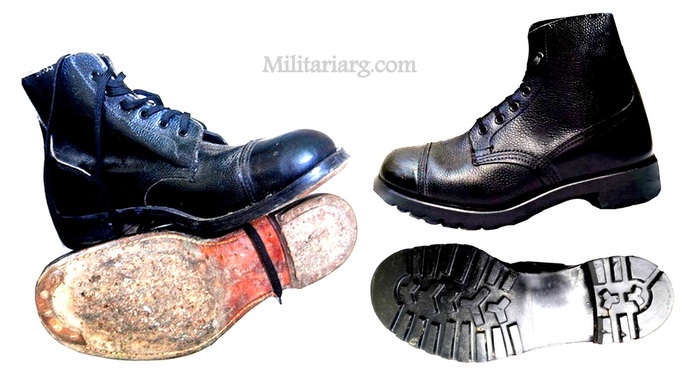
Left: British Ammo Boots. Right: DMS, (Direct Molded Soles) made by UK Autoprufe Ltd 1970. Direct Moulded Sole is footwear composed of only 1 piece. The lack of appropriate ventilation, along with its characteristic of being low, caused many cases of trench foot, freezing and fungus.
Some units used a civilian mountain shoe made by Gorotex (R), Outerwear. This experience posibly came from thoe troops that had been stationed on bases in West Germany and Norway with NATO. They also improvised marching waterproof gaiters for snow marches, along with alpine-style mountain boots. They were elements that resulted in a success compared to the DMS boots and the 37 pattern woolen puttees. The South Atlantic War served to investigate the adequate technology for the clothing, the footwear and equipment (windproof/waterproof) like Gaiters, tents, sleeping bags to combat humidity, cold, wind and any other climactic condition. Later in the Golf War the equipment would require a different approach due to the hot and dry climate.
Some units used a civilian mountain shoe made by Gorotex (R), Outerwear. This experience posibly came from thoe troops that had been stationed on bases in West Germany and Norway with NATO. They also improvised marching waterproof gaiters for snow marches, along with alpine-style mountain boots. They were elements that resulted in a success compared to the DMS boots and the 37 pattern woolen puttees. The South Atlantic War served to investigate the adequate technology for the clothing, the footwear and equipment (windproof/waterproof) like Gaiters, tents, sleeping bags to combat humidity, cold, wind and any other climactic condition. Later in the Golf War the equipment would require a different approach due to the hot and dry climate.
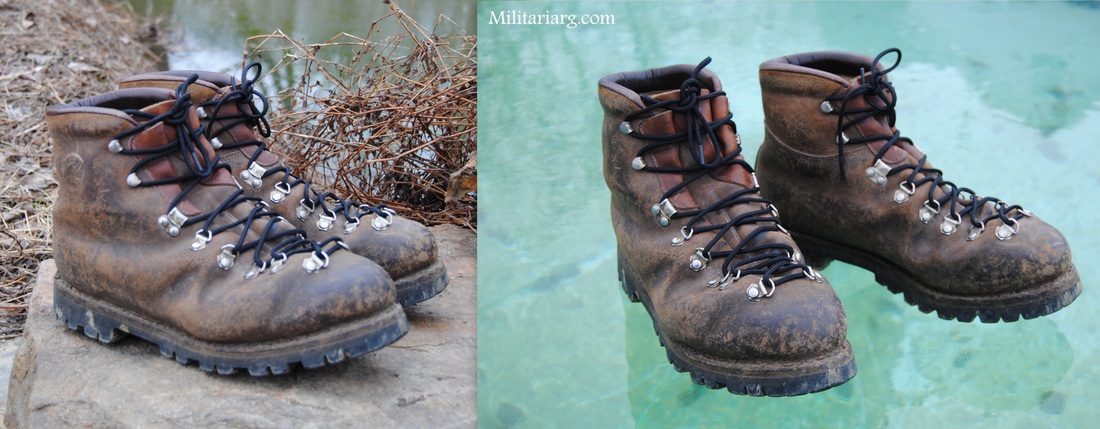
"Galibier", Civilian mountaineering boots. Many thanks to Juan Manuel Terradas for the info.
Webbing and field gear.
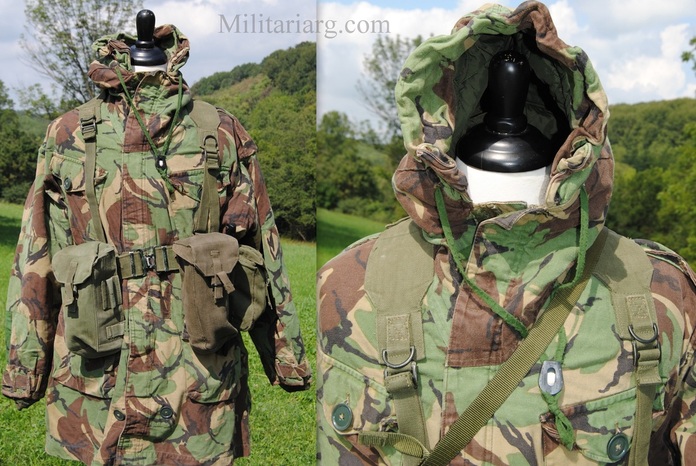
British Army 58 Pattern Webbing
1958 pattern webbing was a modular based personal equipment system issued to the Armed Forces of the United Kingdom from the 1950s up until the mid 80s. It replaced the 1937 Pattern Web Equipment that had served the UK's Armed Forces through the Second World War and the first decade of the cold war. It was in turn gradually replaced in the 1990s by the current issue '95 Pattern Personal Load Carrying Equipment (PLCE), though today it can still be seen in use by the UK's Cadet Forces.
A general issue of 1958 Pattern webbing consisted of a belt, yoke, ammunition pouches (left, with provision for an SLR bayonet, and right, with a pouch to the rear for a rifle grenade), a water bottle pouch, a pair of kidney pouches, a poncho roll and a large pack.
There were a number of ancillary pouches available for specialist tasks, e.g. pistol holster to hold the issue Browning Hi-Power, compass pouch.
All components in the system are made from a sturdy and tight-woven canvas fabric in a dark olive green. The metal fittings are aluminium, anodised dark green.
In its basic and standard configuration, each of the belt-mounted components is secured to the belt by a pair of double hooks (one double hook only in the case of the compass pouch) at the rear, hooked over the belt above and below, with the ends of the hooks further retained in canvas pockets at the rear of the belt. However, variations are to be found - including water bottle pouches and ammunition pouches for non-standard personal weapons fitted with a canvas loop into which the belt is threaded, rather than the metal hooks. This method of attachment allows the pouch to be moved around the belt for the comfort of the user, for example when sitting for long periods.
Several of the individual components evolved over the lifetime of the 1958 Pattern system. There were three iterations of the standard (SLR) ammunition pouches, two of the water-bottle pouch, two of the poncho roll.
The equipment was worn in a series of combinations. Weapon Training Order (or Skeleton Webbing) consisted of Belt, Yoke and Ammunition pouches. Combat Equipment Fighting Order (CEFO), was the term used for the full webbing system and once the Large Pack was attached, it became Combat Equipment Marching Order (CEMO).
Over the course of its service, there were a number of developments and modifications. When the system was originally designed, little scope was given to Nuclear, Biological, and Chemical warfare and when this was addressed, the system gained a respirator haversack to house the then issue S6 NBC Respirator.
58 Pattern is held in stores by a number of County Cadet Forces to replace aging stocks of 37 Pattern webbing which were still on issue in the late 1990s. The belt in particular seems to survive as an unofficial form of dress (replacing the general issue Working Belt) by older soldiers when worn with Combat Soldier 95 clothing.
A proposal to replace the 58 pattern was the 72 pattern
The 1972 Pattern Webbing was a webbing intended to replace the 58 pattern webbing, but never got beyond user trials. It was made from PU coated nylon to counter the Soviet NBC capability, and was designed to be used anywhere from Europe, to Jungle or Desert environments and adjustable to be worn on short duration jungle patrols to general infantry use. Having never got beyond British Army User Trials, the 72 pattern webbing rarely turns up on the collectors market.
Source: Wikipedia
A general issue of 1958 Pattern webbing consisted of a belt, yoke, ammunition pouches (left, with provision for an SLR bayonet, and right, with a pouch to the rear for a rifle grenade), a water bottle pouch, a pair of kidney pouches, a poncho roll and a large pack.
There were a number of ancillary pouches available for specialist tasks, e.g. pistol holster to hold the issue Browning Hi-Power, compass pouch.
All components in the system are made from a sturdy and tight-woven canvas fabric in a dark olive green. The metal fittings are aluminium, anodised dark green.
In its basic and standard configuration, each of the belt-mounted components is secured to the belt by a pair of double hooks (one double hook only in the case of the compass pouch) at the rear, hooked over the belt above and below, with the ends of the hooks further retained in canvas pockets at the rear of the belt. However, variations are to be found - including water bottle pouches and ammunition pouches for non-standard personal weapons fitted with a canvas loop into which the belt is threaded, rather than the metal hooks. This method of attachment allows the pouch to be moved around the belt for the comfort of the user, for example when sitting for long periods.
Several of the individual components evolved over the lifetime of the 1958 Pattern system. There were three iterations of the standard (SLR) ammunition pouches, two of the water-bottle pouch, two of the poncho roll.
The equipment was worn in a series of combinations. Weapon Training Order (or Skeleton Webbing) consisted of Belt, Yoke and Ammunition pouches. Combat Equipment Fighting Order (CEFO), was the term used for the full webbing system and once the Large Pack was attached, it became Combat Equipment Marching Order (CEMO).
Over the course of its service, there were a number of developments and modifications. When the system was originally designed, little scope was given to Nuclear, Biological, and Chemical warfare and when this was addressed, the system gained a respirator haversack to house the then issue S6 NBC Respirator.
58 Pattern is held in stores by a number of County Cadet Forces to replace aging stocks of 37 Pattern webbing which were still on issue in the late 1990s. The belt in particular seems to survive as an unofficial form of dress (replacing the general issue Working Belt) by older soldiers when worn with Combat Soldier 95 clothing.
A proposal to replace the 58 pattern was the 72 pattern
The 1972 Pattern Webbing was a webbing intended to replace the 58 pattern webbing, but never got beyond user trials. It was made from PU coated nylon to counter the Soviet NBC capability, and was designed to be used anywhere from Europe, to Jungle or Desert environments and adjustable to be worn on short duration jungle patrols to general infantry use. Having never got beyond British Army User Trials, the 72 pattern webbing rarely turns up on the collectors market.
Source: Wikipedia
Set of British Army issue 58 Pattern Webbing (with a few PLCE pieces included to make a complete set) that was in use with the Army during the Falklands campaign and is still in use today with many TA and Army Cadet Units.
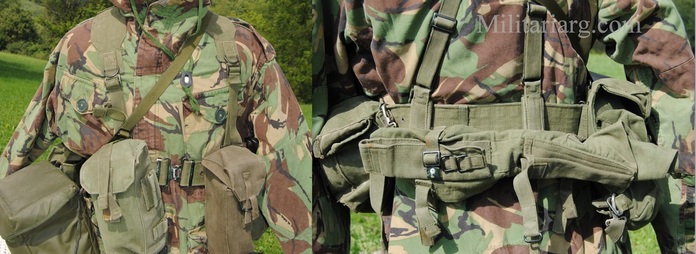
58 Pattern Tactical Belt. S6 gasmask bag; p58 Ammo pouches. Right: 58 pattern poncho roll.
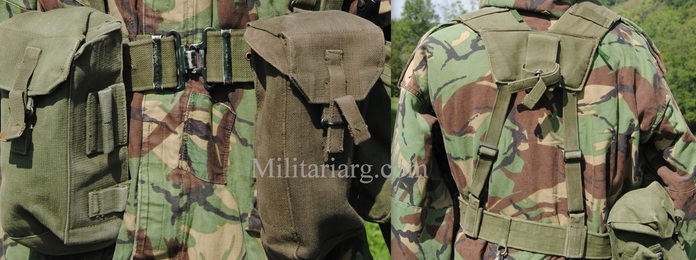
M58 Ammo pouches and 58 Pattern Yoke, Shoulder Strap
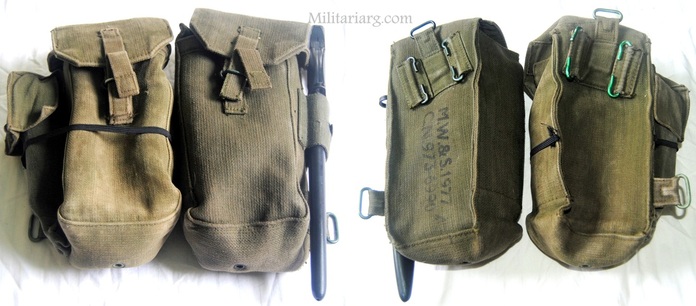
1958 Pattern, P58 Ammo Pouches, Olive Drab color, made by M.W.& S Ltd and dated 1977
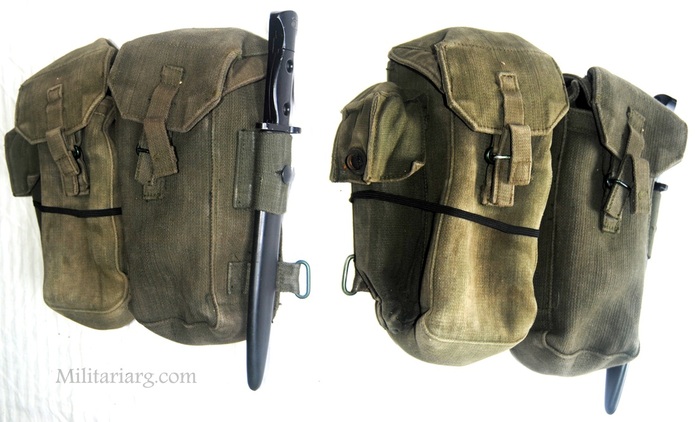
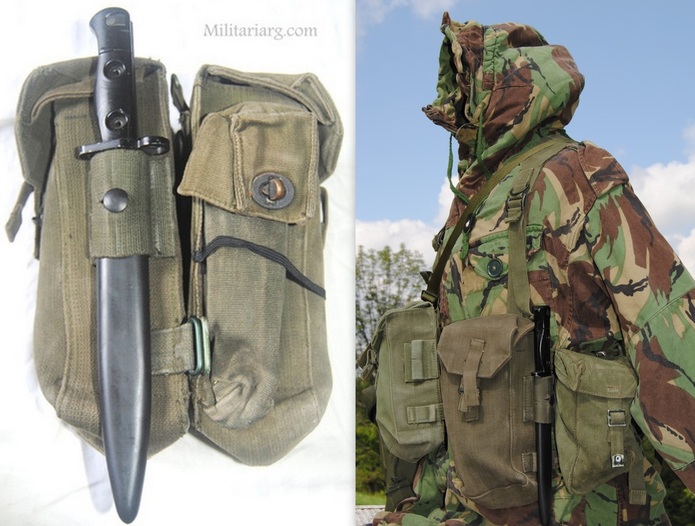
Alternative Frog for SLR Bayonet and pouch for L9A1 Magazines.
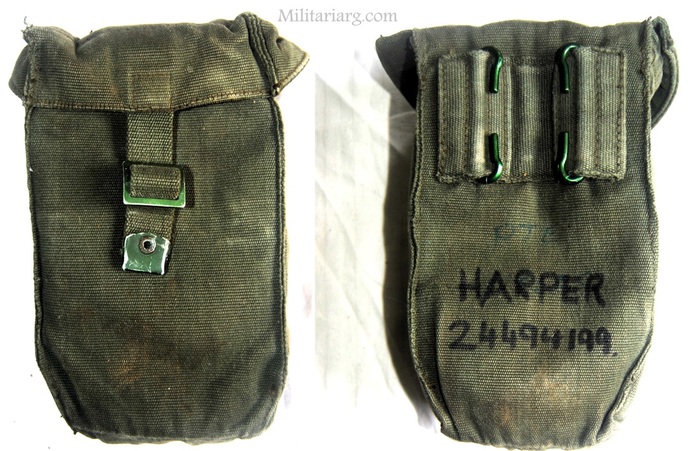
58 Pattern Water Bottle Canteen Pouch.
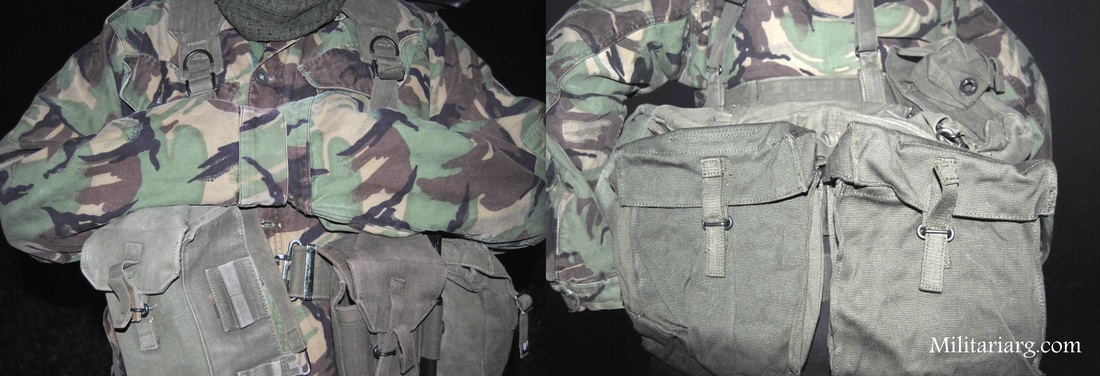
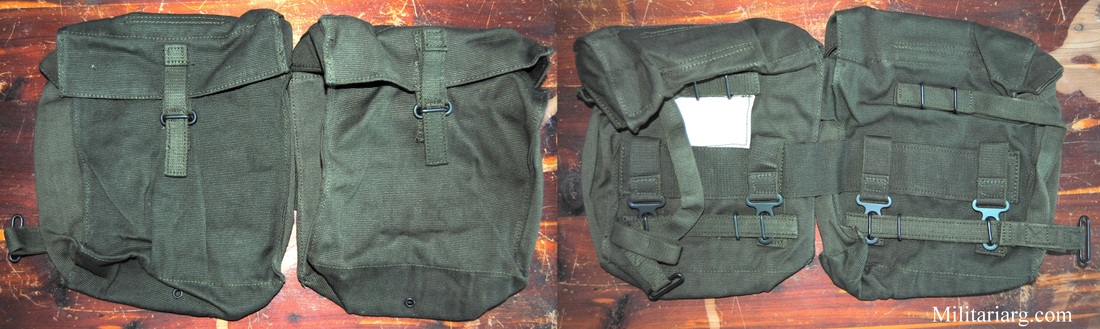
58 Pattern "Kidney" Pouches. The mess tin pouches were called "Kidney" because they were worn in the back below the field pack. Argentine Army during the War used the 1961 model field buttpack "Bolsa de rancho", type for carried the mess kit
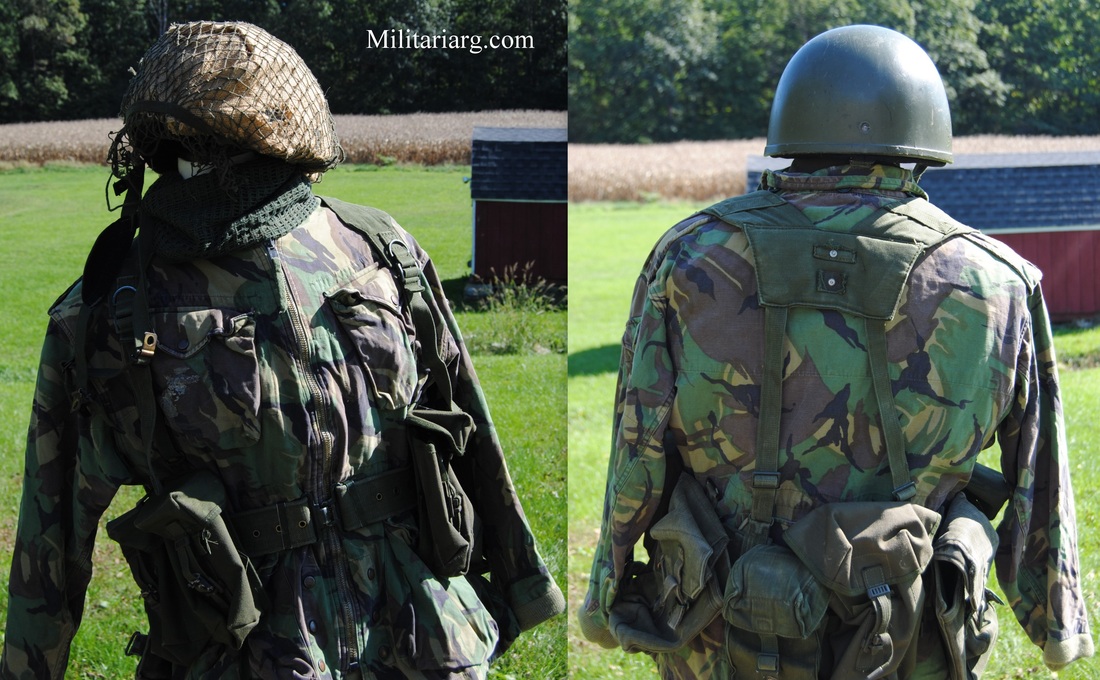
Mix of 58 pattern and PLCE "Personal Load Carrying Equipment", (Double Ammo Pouches). A 58 Pattern Yoke / Shoulder Strap; A 58 Pattern Webbing Belt; 2 x 58 Pattern Unility Pouches; 1 x 58 Pattern Water Bottle Pouch; 2 x PLCE Ammunition Pouches; 1 x PLCE Utility Pouch.
According to Wikipedia, The PLCE replaced 58 Pattern webbing, which was made of olive canvas: this system was outdated by the by the 1980s.
According to Wikipedia, The PLCE replaced 58 Pattern webbing, which was made of olive canvas: this system was outdated by the by the 1980s.
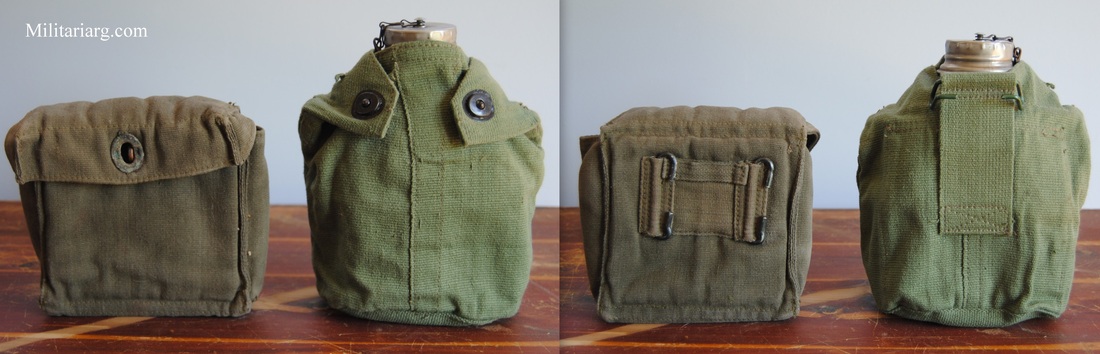
M58 Binoculars Pouch and P-1944 Water Bottle & Cup with cover.
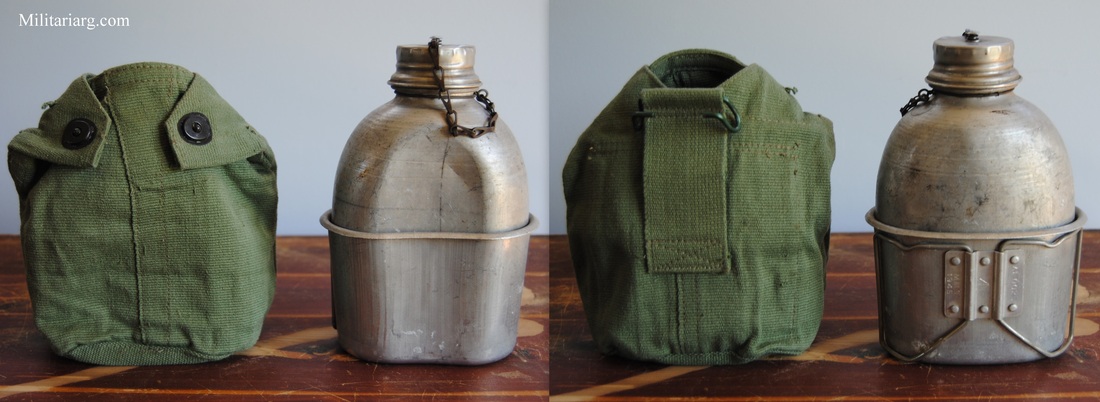
P-44 Water Canteen and cover.
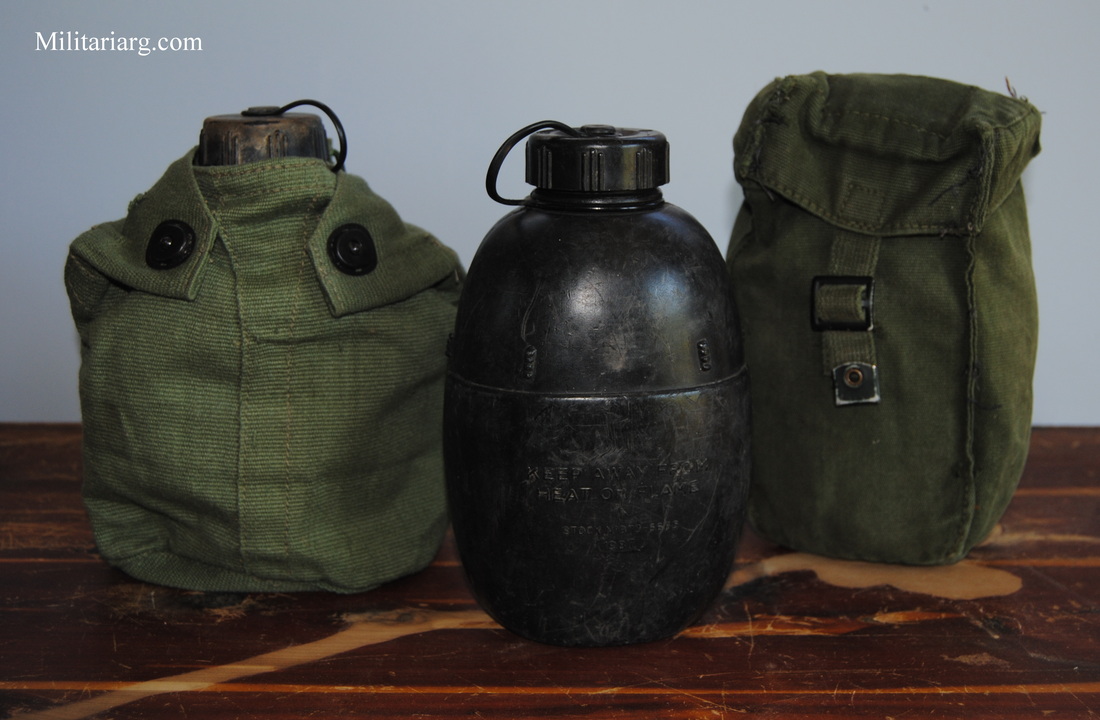
58 Pattern, Plastic Watern Canteen and p44 cover; P58 Bottle and canteen pouch. Made by UK Osprey.
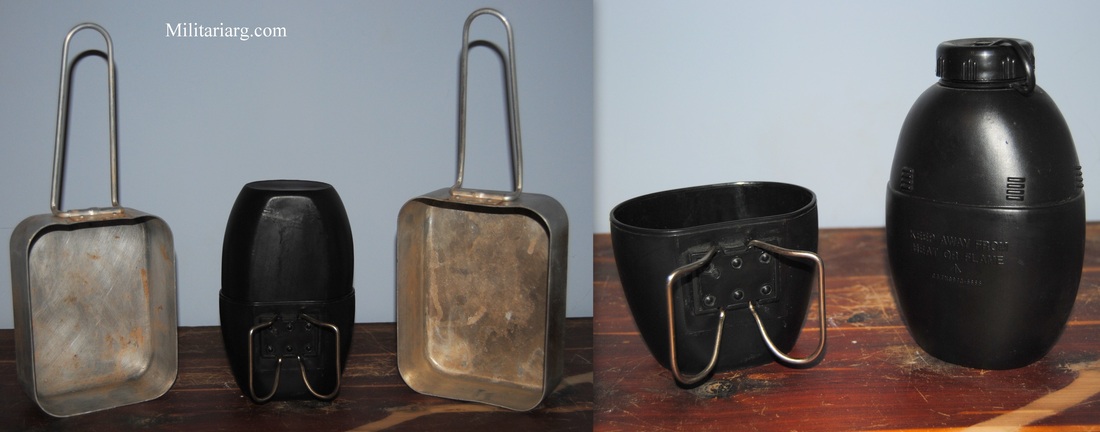
British 58 Pattern, waterbottle and cup and set of mess tins.
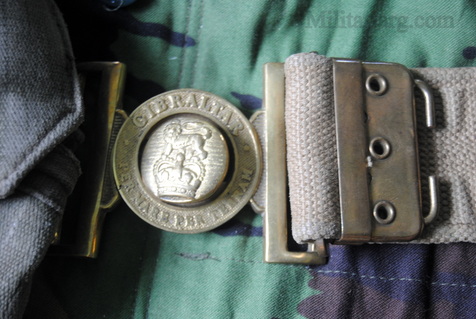
Gibraltar Belt Buckle. According to some Argentine POWs, they saw this buckle on some of the British who guarded them. It is a crown with a lion above it.
Equipment:
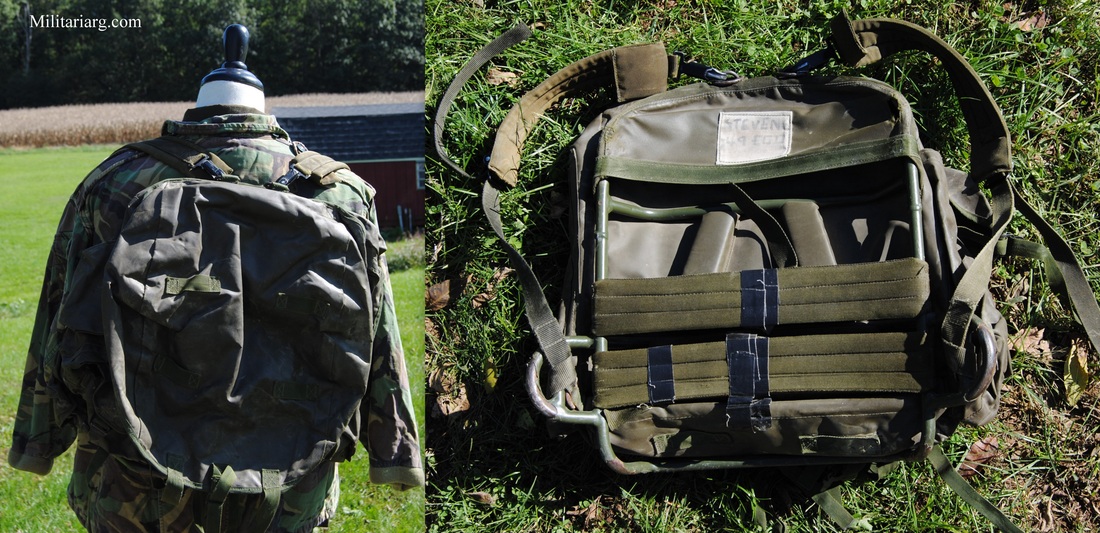
Pathfinder Bergen Webbing. SAS and Paratrooper Regiment Bergen with metal frame, adjustable metal straps, side pouchs, outer ladders to fix roll matts. Snow lock round top, inside lid pocket, 2 ice axe loops, tie down straps.
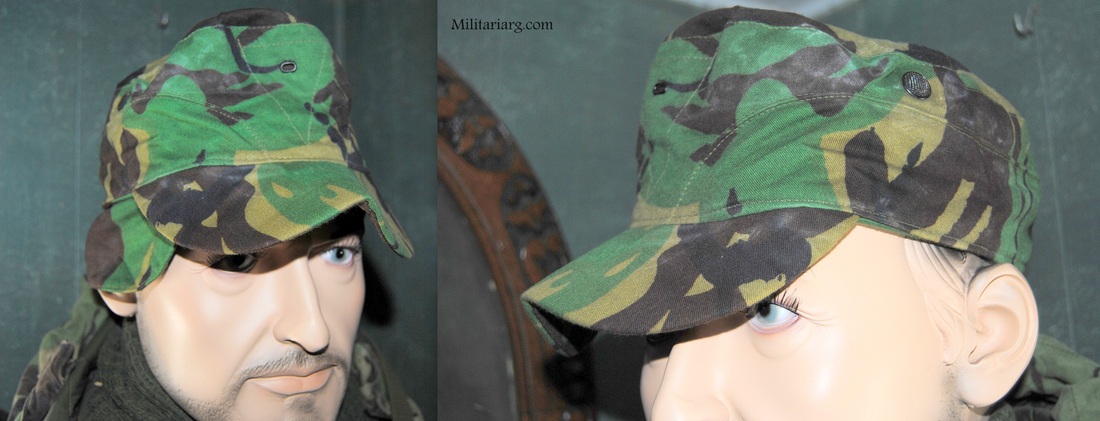
Patrol Cap SAS Para Sniper. B.D. Hats & Garments Ltd.
Survival Suit.
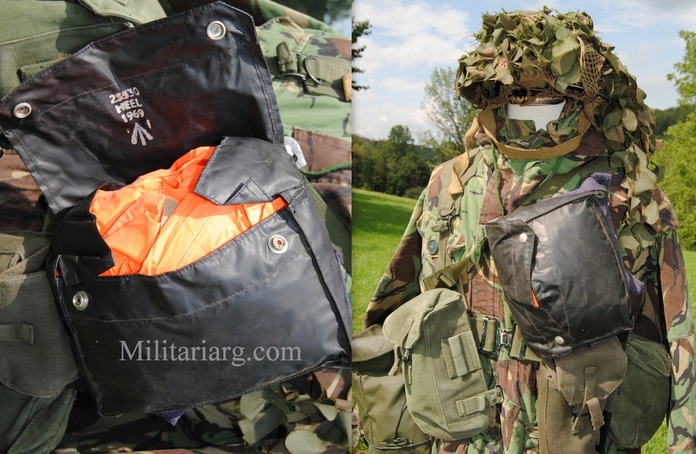
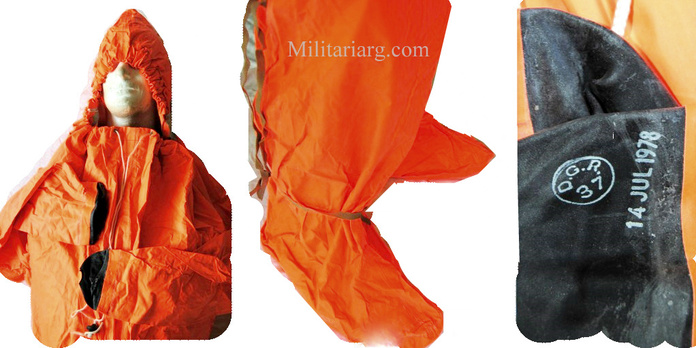
This survival suit was used after abandoning the Sir Galahad after being attacked by the Argentine Air Force and before it sank. It was used by the Logistical Command Unit of the Royal Marines during the war. The survivors were transferred to the HMS Intrepid. The June 8th battle was the bloodiest of the war and the Argentine naval attack provoked the most casualties for Great Britain.
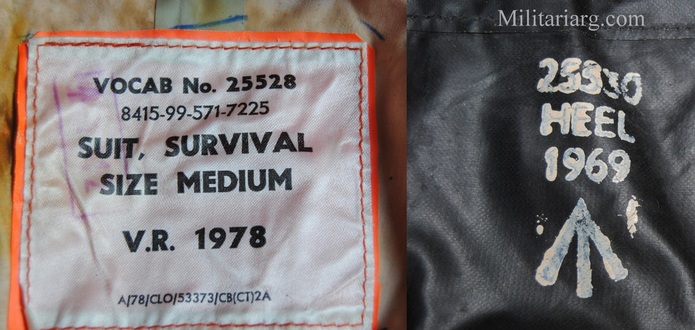
Survival Suit and case.
British Army Gas Mask, dated 1978:
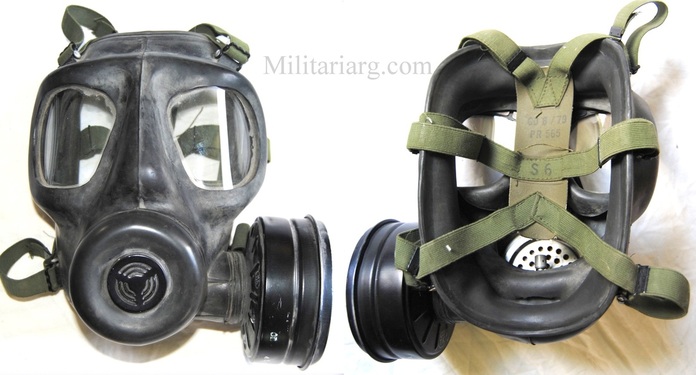
S6 Gas Mask, ( Dated 1978).
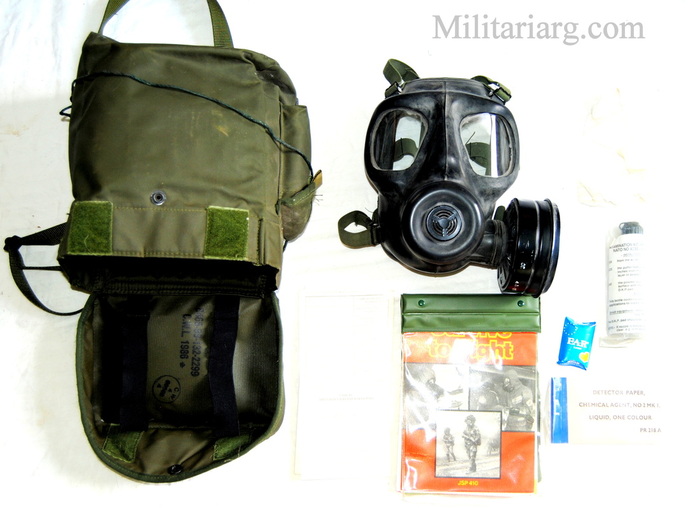
Bag, Carrying Case dated 1986.
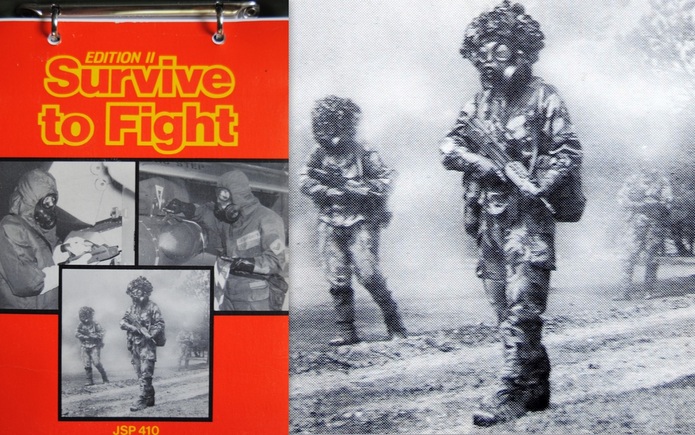
Note the NBC Nuclear Biological Chemical Protection Suit, S10 respirator and the 5.56x45mm NATO SA80, "Bullpup" Family with standard SUSAT sight. 85 Pattern ?
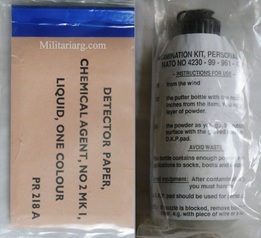 |
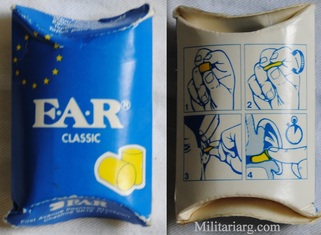 |
Military Gear, Clothing.
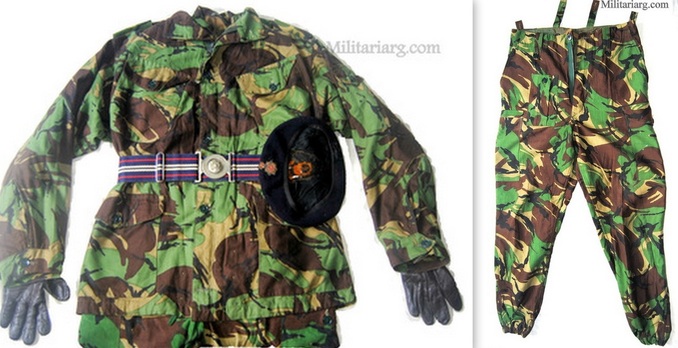
DPM 68 pattern, Smock Combat made by C&C Cockson & Clegg Ltd jacket and Royal Corps of Transport (RCT), Belt and beret with embroidered badge. During The South Atlantic War, the 407 troop Royal Corps of Transport, 2nd lt Ash RCT participated with the 5th Infantry Brigade Commander unders the orders of Brigadier Anthony Wilson
1968 Pattern, Trousers Combat made by James Smith & Co. Derby Ltd, Staveley CT4B/1123
1968 Pattern, Trousers Combat made by James Smith & Co. Derby Ltd, Staveley CT4B/1123
Disruptive Pattern Material (DPM)
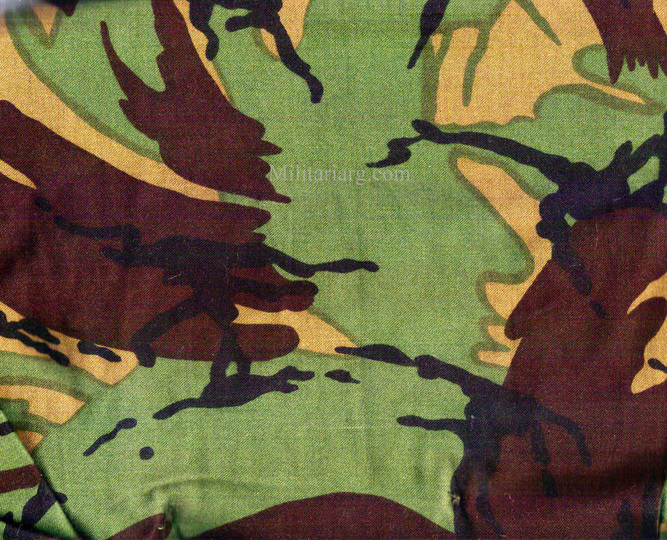
According to Wikipedia The Disruptive Pattern Material (DPM) is the commonly used name of a camouflage pattern used by British forces as well many other armies worldwide, particularly in former British colonies.
Amongst the countries that use or have used DPM at any time include Argentina, Brunei, Bulgaria, Canada, Cambodia, China, Jordan, Papua New Guinea, Gambia, Hong Kong, Indonesia, Iraq, Ireland, Lebanon, Malaysia, the Netherlands, New Zealand, Oman, Pakistan, Philippines, Portugal, Taiwan, South Africa, Srpska, Romania, Saudi Arabia, Swaziland, Tanzania, the United Arab Emirates, the United States (Marine Corps (in UK-supplied NBC suits) & Air Force), and Yemen.
Amongst the countries that use or have used DPM at any time include Argentina, Brunei, Bulgaria, Canada, Cambodia, China, Jordan, Papua New Guinea, Gambia, Hong Kong, Indonesia, Iraq, Ireland, Lebanon, Malaysia, the Netherlands, New Zealand, Oman, Pakistan, Philippines, Portugal, Taiwan, South Africa, Srpska, Romania, Saudi Arabia, Swaziland, Tanzania, the United Arab Emirates, the United States (Marine Corps (in UK-supplied NBC suits) & Air Force), and Yemen.
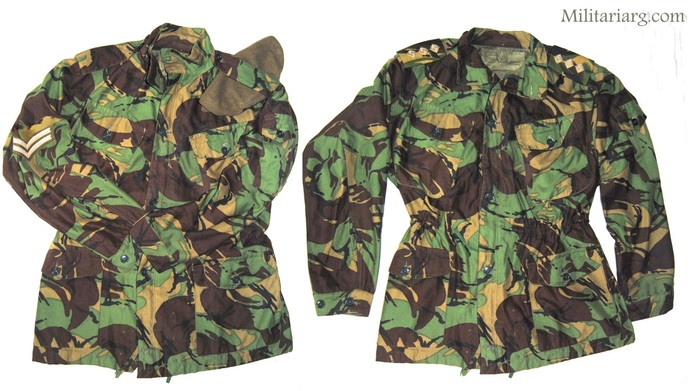
DPM Smock Combat Jacket with Corporal stripes. Royal Army Captain slip-on shoulder rank.
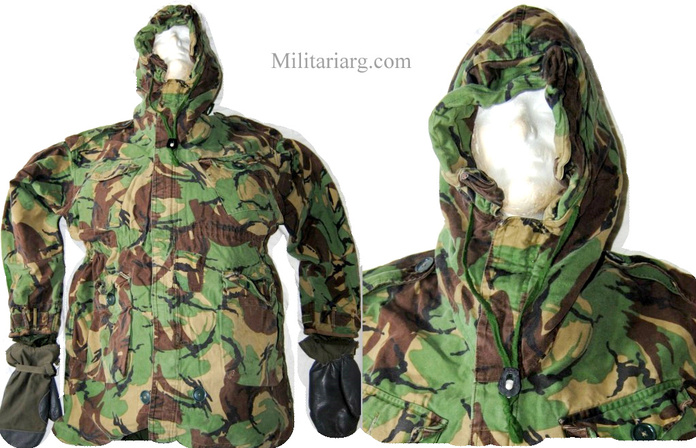
ECWCS Parka DPM camo, (Disruptive Pattern Material). 2 way zipper front with grip-strip storm flap; 2 button-flap, angled chest pockets; 2 button-flap base pockets; Attached drawstring hood; Epaulets Reinforced elbows; Grip-strip cuffs Removable, quilted nylon polyester liner.
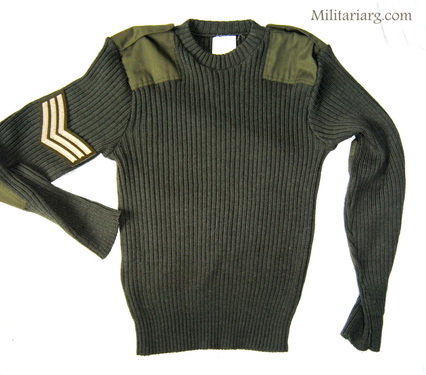
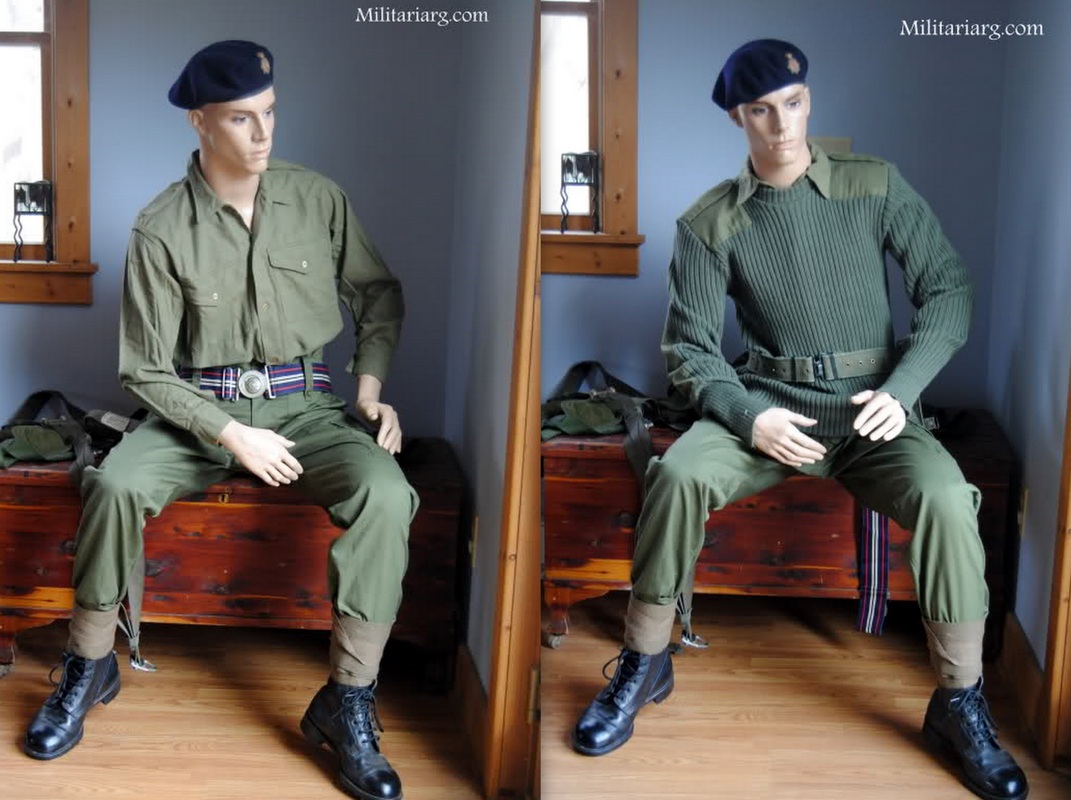
British "Wooly" Pully Military Sweater with Sergeant rank, The Argentine army used this same sweater called the tricota.
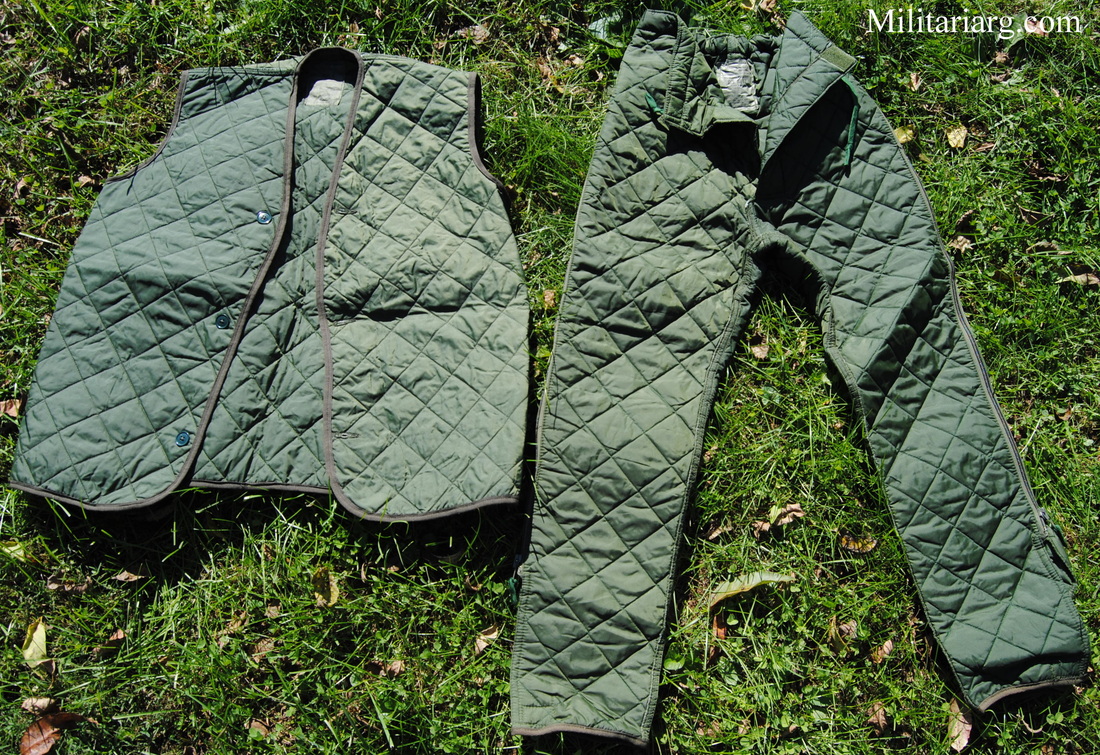
Cold Weather Gilet Vest and Trousers.
Military Radio Equipment
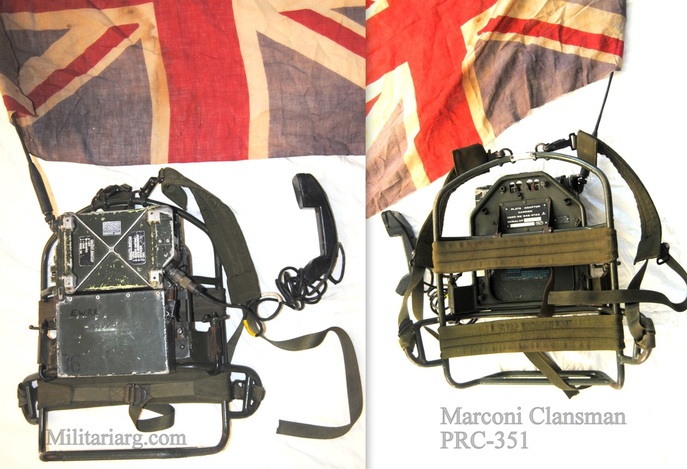
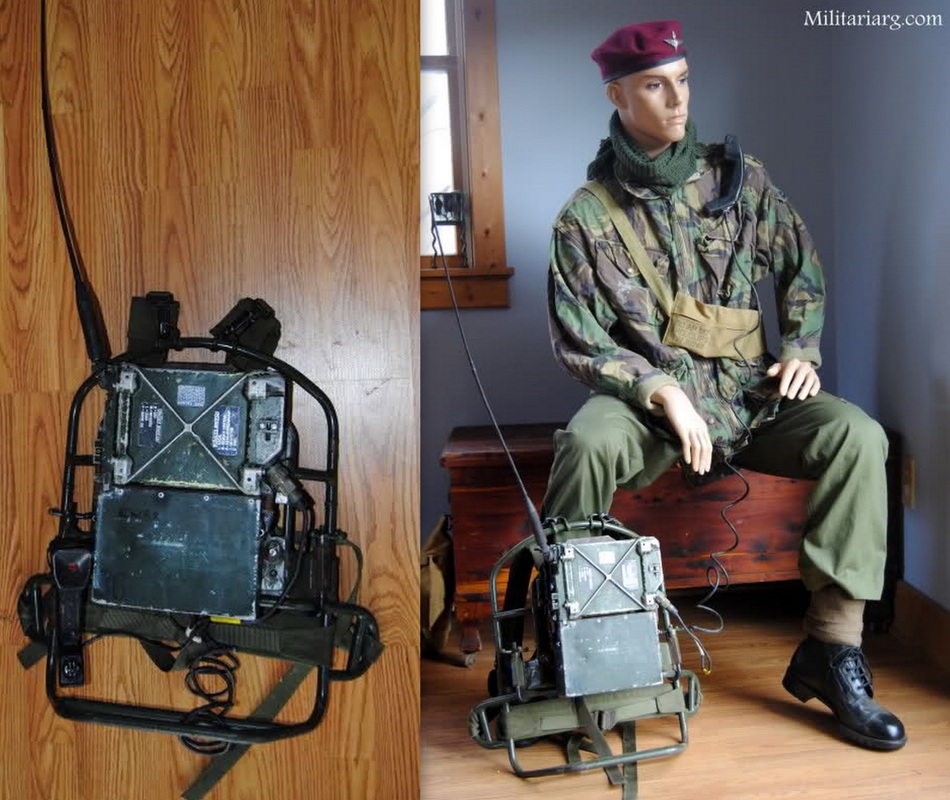
Marconi Clansman UK/PRC-351 VHF/FM Manpack or vehicle mounting, with carrying frame for clip-in brackets in the Land Rovers, FFR, GS and GP trucks.
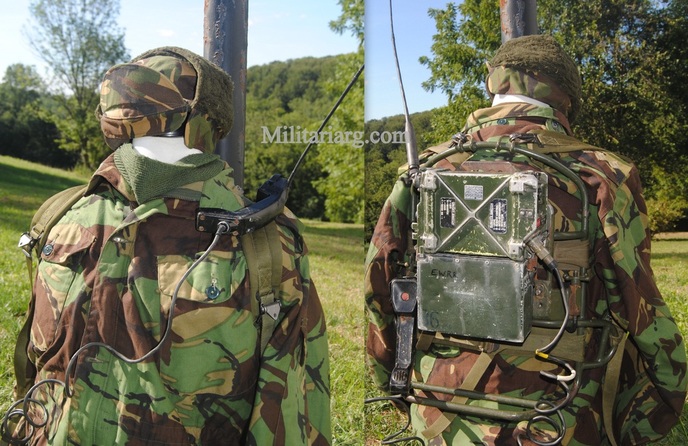
Clansman Family:
1980s
(Manufacturer: Racal, Marconi, MEL and Plessey)
HF Radio Sets: PRC 319, PRC 320, VRC 321, VRC 322
VHS Radio Sets: PRC 349, PRC 351/352, VRC 353
UHF Radio Sets: PRC 344
Clansman Accessories:
Batteries and Charging, Control Harness and Audio Gear.
IBRU (Interconnecting Box Radio-rebroadcast Unit). DMU. SURF.
Antenna Tuning and Matching: TURF, TUAAM. Elevated VHF Antenna (EVHF).
1980s
(Manufacturer: Racal, Marconi, MEL and Plessey)
HF Radio Sets: PRC 319, PRC 320, VRC 321, VRC 322
VHS Radio Sets: PRC 349, PRC 351/352, VRC 353
UHF Radio Sets: PRC 344
Clansman Accessories:
Batteries and Charging, Control Harness and Audio Gear.
IBRU (Interconnecting Box Radio-rebroadcast Unit). DMU. SURF.
Antenna Tuning and Matching: TURF, TUAAM. Elevated VHF Antenna (EVHF).
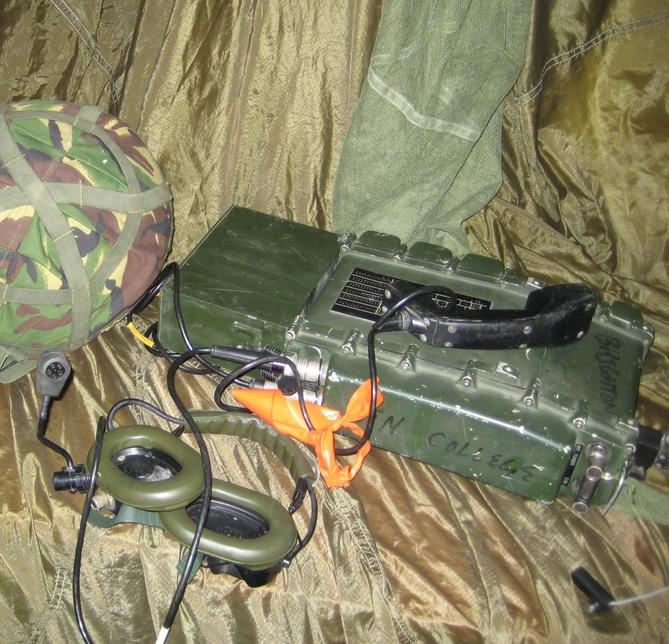
PRC 320 HF Radio, headphones, handset and MK.VI Kevlar Helmet. Photo: Wikipedia.
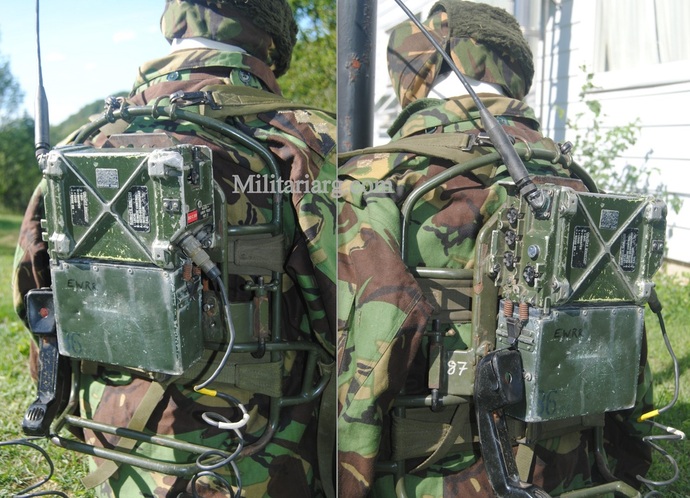
The Clansman family of Military Radio Sets comprises nine main radio units, operating in the High Frequency (HF), Very High Frequency (VHF) and the Ultra High Frequency (UHF) Radio Bands.
Models are designated "UK/PRC" or "UK/VRC", which stand for "United Kingdom / Portable Radio Communicator" and "United Kingdom / Vehicle Radio Communicator" respectively. The radios first came into service in the late 1970s at that time the main advantage of the Clansman radios was that they were all frequency synthesised (switched channels, as opposed to using a variable tuning scale for example). This provided frequency stability, obviating the need to tune the radio again, once a frequency was set. Previous UK military radios were much less stable, and had to be frequently tuned (or might need to be tweaked to "pull in" a weak signal).
Source: Wikipedia.
Models are designated "UK/PRC" or "UK/VRC", which stand for "United Kingdom / Portable Radio Communicator" and "United Kingdom / Vehicle Radio Communicator" respectively. The radios first came into service in the late 1970s at that time the main advantage of the Clansman radios was that they were all frequency synthesised (switched channels, as opposed to using a variable tuning scale for example). This provided frequency stability, obviating the need to tune the radio again, once a frequency was set. Previous UK military radios were much less stable, and had to be frequently tuned (or might need to be tweaked to "pull in" a weak signal).
Source: Wikipedia.